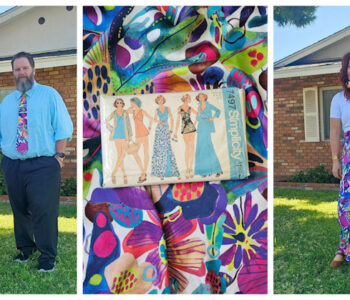
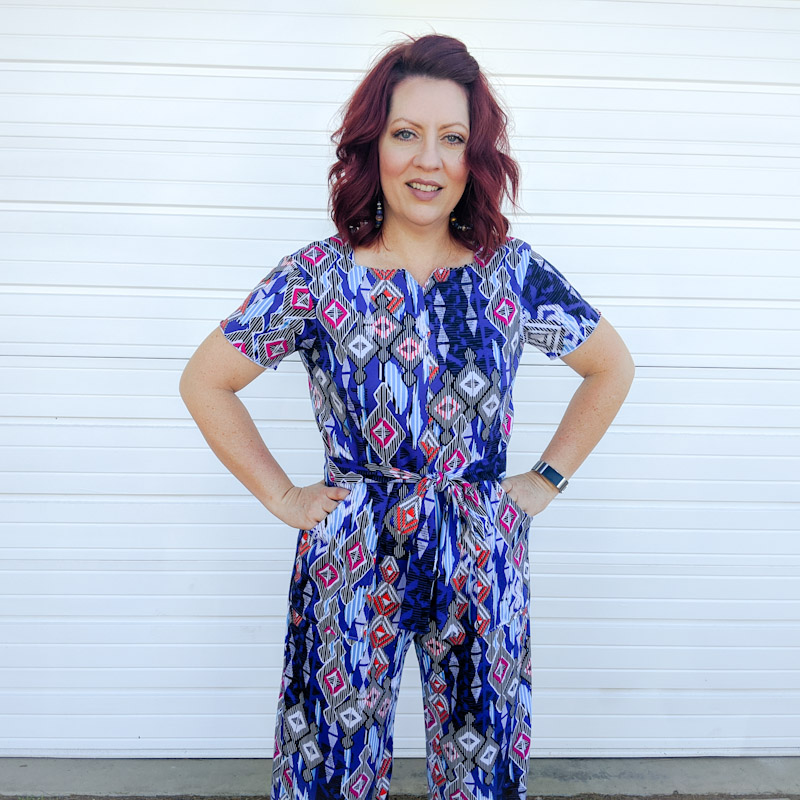
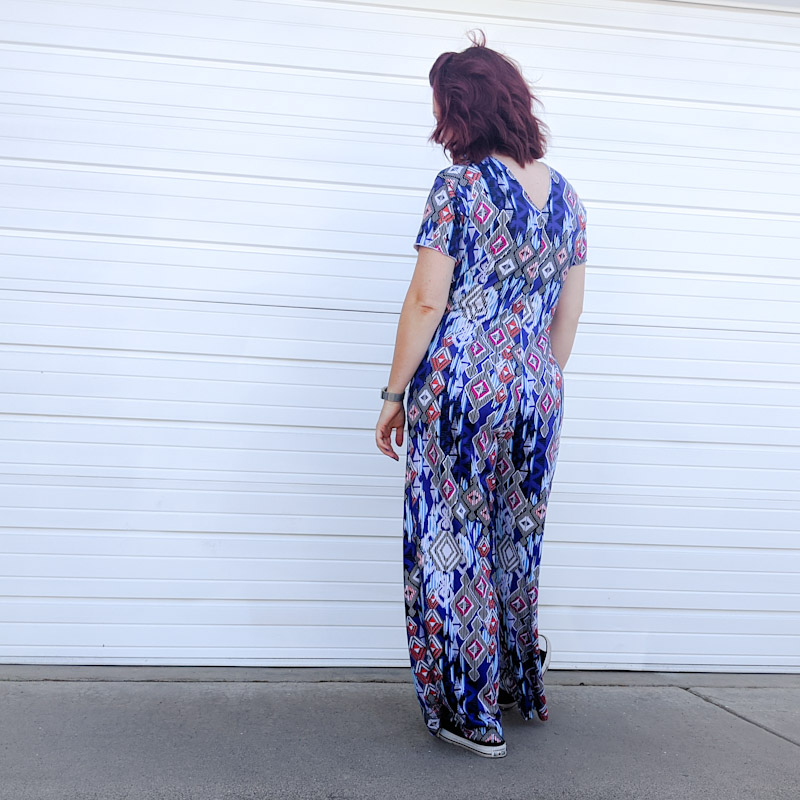
Jump Up Suit by Alice and Co
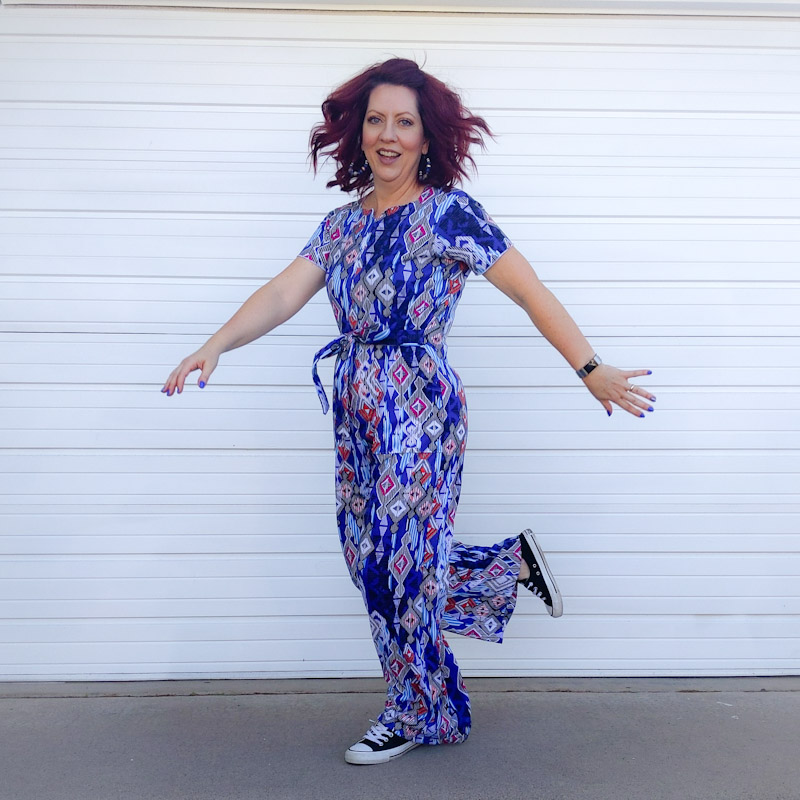
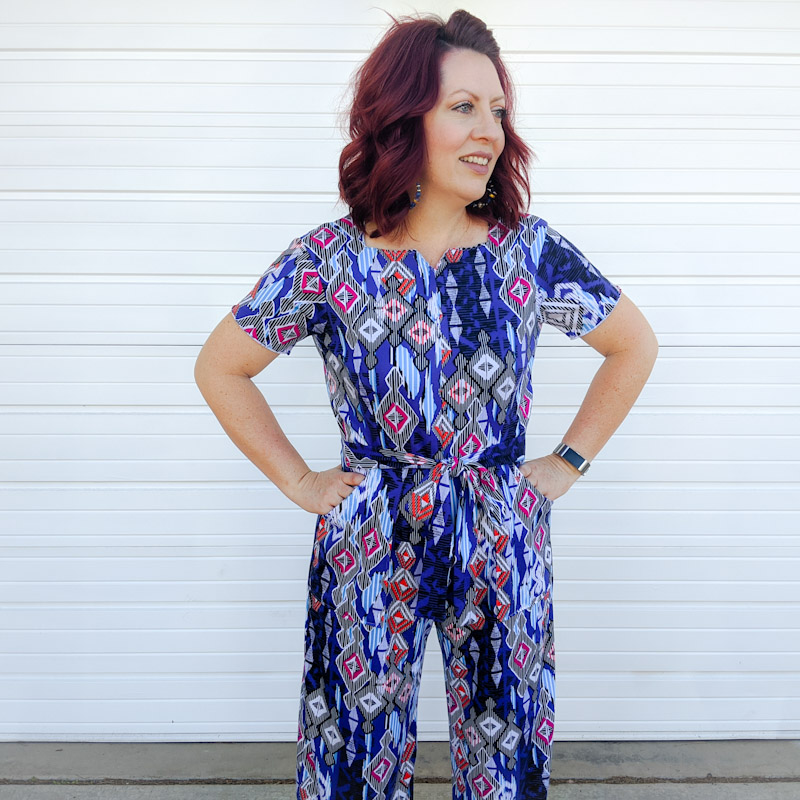
At the end of September 2019 I saw a sneak peak of the Alice and Co Jump Up suit pattern. It was a simple knit jumpsuit pattern with no closures and just two pattern pieces. The basic elements had me thinking of all sorts of ways I could hack it and make it my own. I loved that. Needless to say I was very intrigued, so when it was released shortly after Christmas I bought it.
I am 5 ft 5 in (165.1 cen). My measurements are:
Bust- 37in.(93.98cen.)
Waist- 32in.(81.28cen.)
Hips- 42in.(106.68cen.)
I went with the Size 14 in a ponte knit.
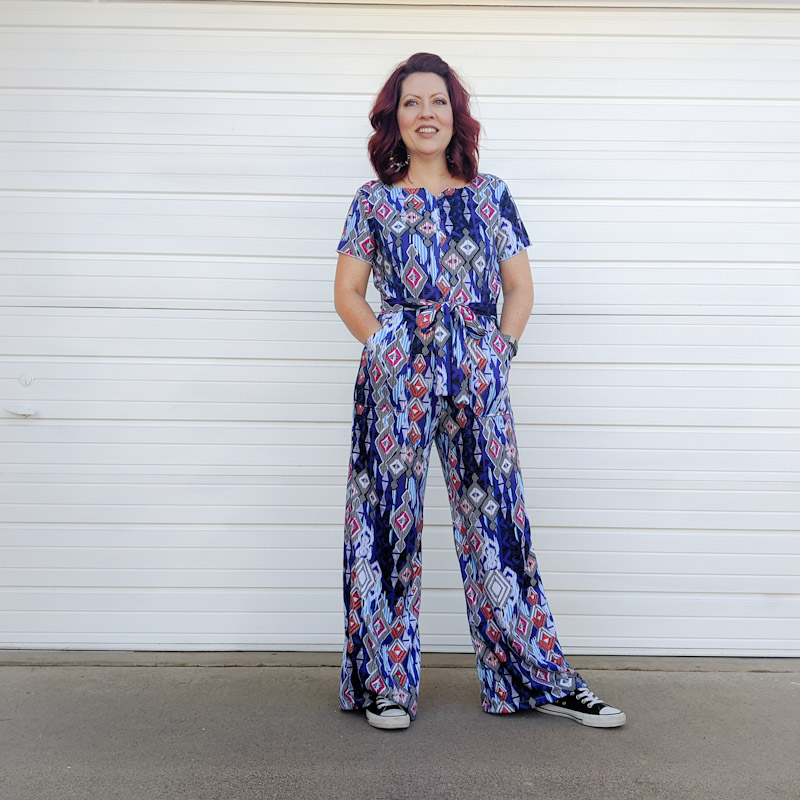
Now if you know anything about me, you know I LOVE pockets. So I knew right away I would need to add some to this jumpsuit in order for it to work for me. I thought the True Bias Lander Pants pockets would work really well. They are attached to the outside so I wouldn’t need to adjust the jumpsuit, just the pocket pieces.
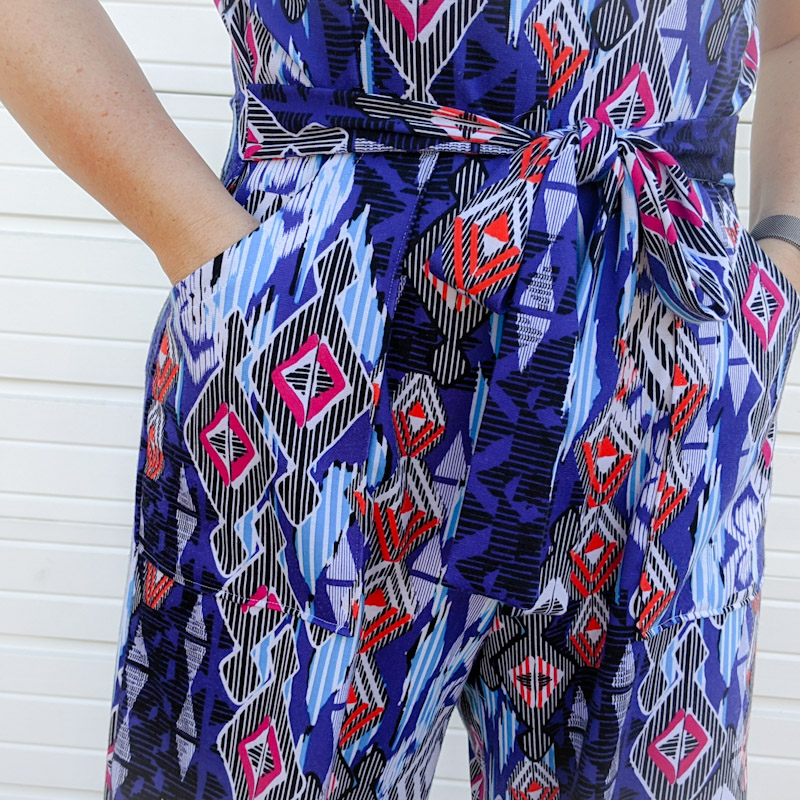
To figure out pocket placement I simply marked the waist according to the pattern, then pinned it at the shoulder seam allowances and tried it on to make sure it matched up to my waist. It did, so I knew I could use the waist marking for the pocket placement. Before putting the pockets on I had to sew the front and back darts. Then I used the waist marking to line the top part of the pocket up and sewed them on.
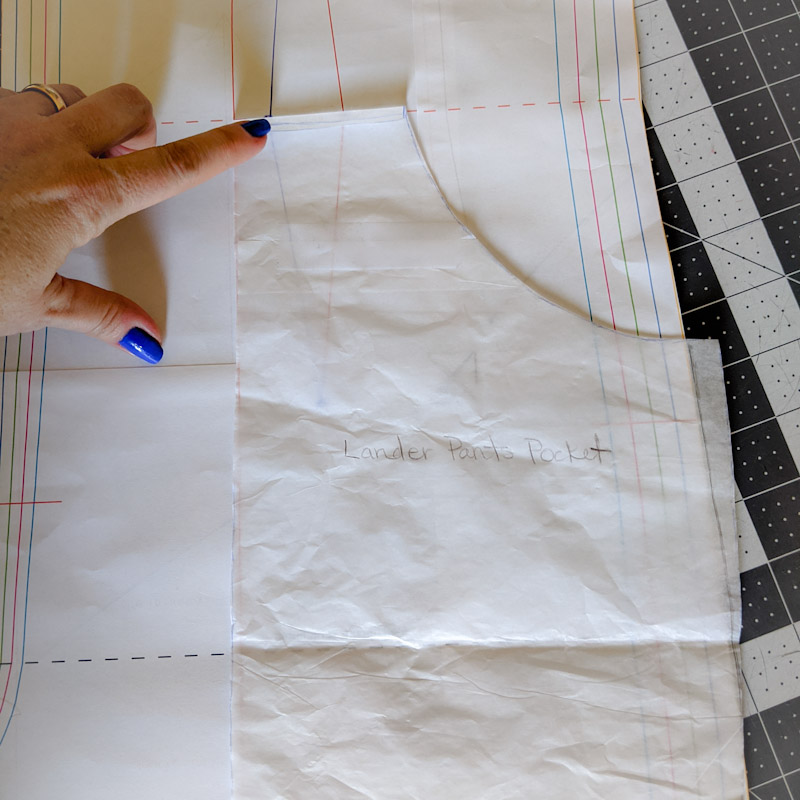
Here’s a little visual with the pattern pieces to help you understand what I mean. I actually went back and marked my pattern pieces afterward with notches. I ended up cutting that overlapping piece of the pocket off.
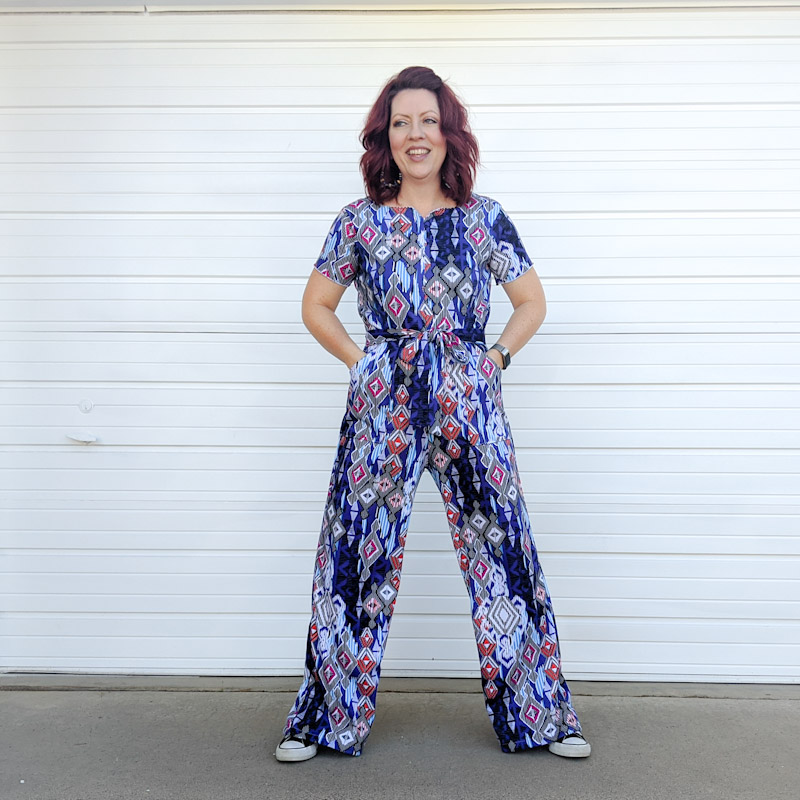
I also knew I would want a belt tie around my waist. For that I cut two 4 x 27 in. strips of fabric on the grain-line because I didn’t want them to stretch very much. I folded each one in half and sewed it together leaving one end open on each to pull right side out. Then I attached them at the waistline markings on each side.
I also added sleeves. I was really undecided about this part until I was almost done. The way I did them may not make a whole lot of sense to people who know how to do it. I know sleeveless shirts and shirts with sleeves have a different armscye, but because I decided to add sleeves after everything was already cut out and pretty much sewn together this was all I could think of to do. Had I decided to add sleeves earlier, (like when I was cutting it all out) I would have used another pattern armscye and sleeve for the adjustment. I don’t know much about pattern drafting but this is what I did to make the sleeve. Here’s what it looked like. Try not to laugh.
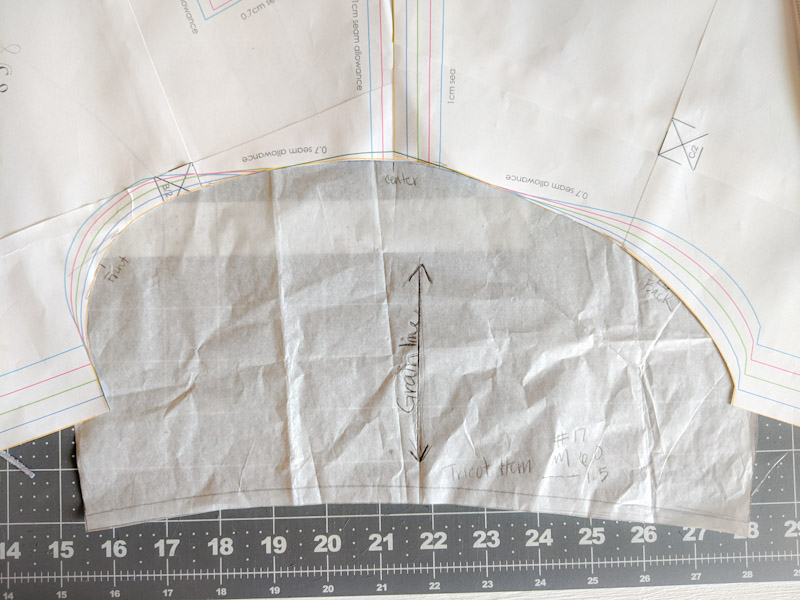
I taped the pattern pieces together at the shoulder seam allowance and laid them flat so I could see the shape of the area. Then I traced it and added a 1 cm seam allowance. I marked the center, front and back with a little notches. .
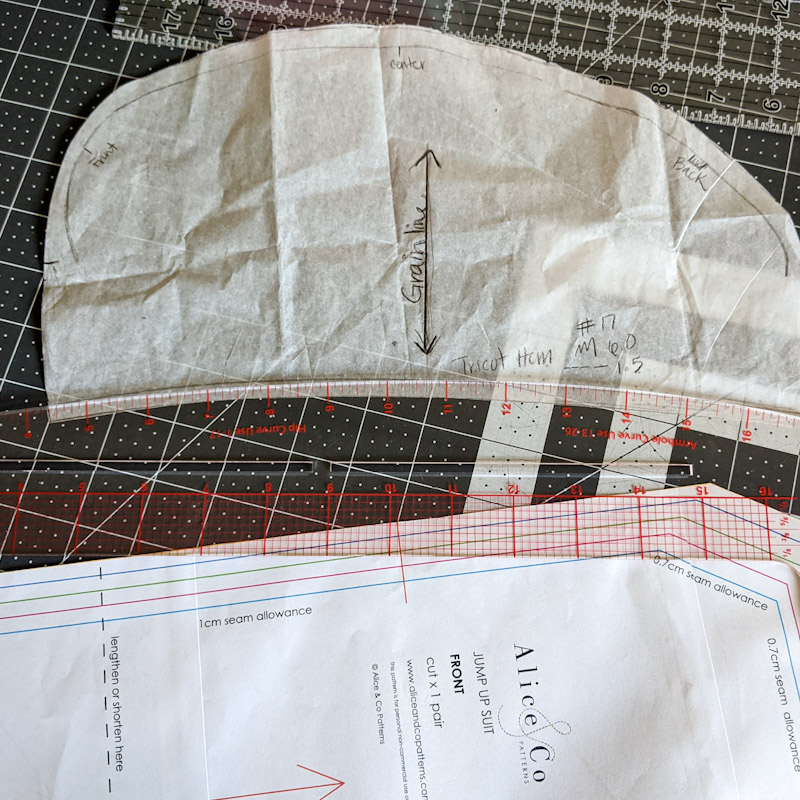
I used my french curve ruler to fix any weird spots around the shoulder part and then I used it on the bottom hem part so it was curved and not straight.
I basted one of the sleeves in to check and make sure it was gonna work. To my total surprise it did. It felt really comfortable too! I was pretty pleased with this little make shift sleeve. Honestly, its kind of embarrassing how little I know about sleeve drafting for how long I’ve been sewing. I should probably take a class.

In the pattern instructions a different technique was suggested for finishing. I decided to give it a try. It’s called a Picot edge. You use a blind hem stitch on your machine at the fabric edge and it makes these cute little scallops. I wasn’t sure at first but I practiced on some scraps for a bit and decided I liked it. Its a really different way to finish garments. So I did the neckline and my little sleeve hem this way. For the legs, I had to cut almost 4 inches off then I hemmed them 1 inch with a regular straight stitch.
The pattern was quite simple which made it very easy to add all the things I wanted. Plus not having to worry about doing a closure makes it more appealing. I do have to say there were some things things that might make it difficult for beginners. For instance when I printed my pattern, the darts were not complete and there was basically no directions on how to finish them or sew them. Not sure if it’s just an oversight in editing or if you are expected to draft your own darts to complete it. I just made my own and it fit very nicely. Also the front neckline is darling but a beginner would have some difficulty finishing it. The Picot Edge is really the easiest way to do it as turning it under and hemming was not fun. I don’t usually have much trouble with necklines but this one was not cooperating. So I opted for new things and did the suggested Picot Edge.

I was really pleased with my first make of 2020! It’s super comfy and I will probably wear it a ton or make more. If you’re undecided about the whole jumpsuit trend, maybe give this one a try. Its super easy and because it’s made with a knit you won’t have to fuss much with fitting. I can see why they call this the “Jumpsuit Converter.”