Father and Son Matching Cardigans
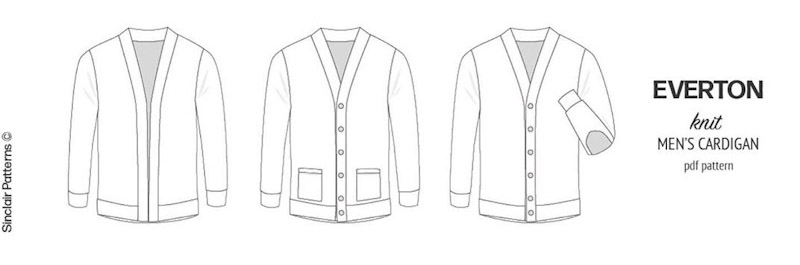
In September I had the opportunity to test a men’s pattern for Sinclair Patterns. It was the Everton Cardigan with optional button closure, patch pockets and elbow patches. It also comes in short, regular and tall options. Perfect for fall weather. My husband was so excited for me to use him to test this pattern.
When you are testing a pattern its customary to do a “Fit” garment first and send your feedback to the pattern maker. Then proper adjustments can be made before you do the “Final” garment. I’ve participated in pattern tests where I sewed up to 5 different “Fit” garments because the pattern kept changing. The “Final” garment pics are usually used to promote the pattern once its released. This test I did with Sinclair Patterns was pretty straight forward. I only sewed two Cardigans. We were also encouraged to embellish our patterns to suit our models styles. I will be sharing what we did below.
These were some of our “Fit” pics.
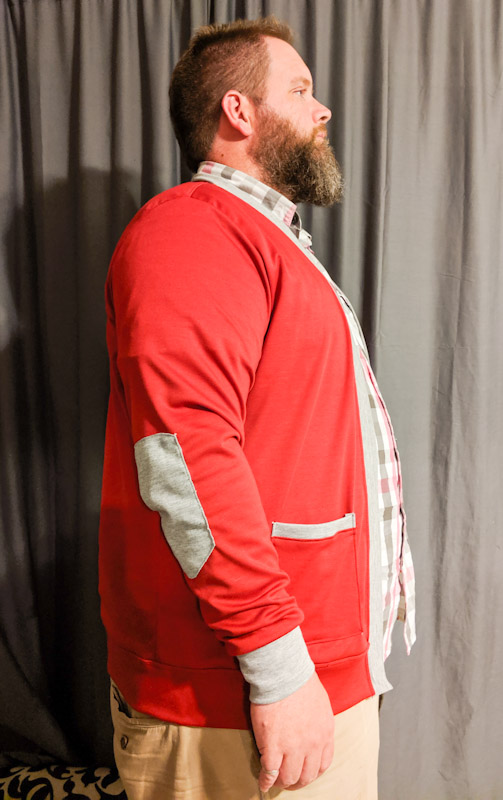
It fit him but he likes the things he wears to be a bit roomier. I knew I’d need to make adjustments. We decided not to do elbow patches in our final garment as well.
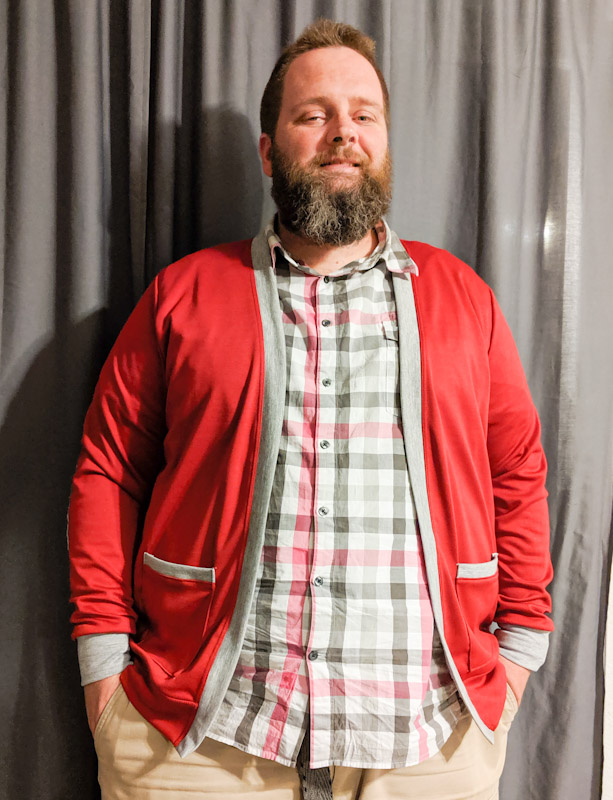
My Husband was outside the size range of the Everton Cardigan but I knew altering it to fit him wouldn’t be a problem. These are the simple Alterations I made:
- Widen Front and Back Bodices both by two inches at the side from the armpit down.
- Adjust sleeve to fit that area.
- Lengthen the Tall bodice piece by 1 more inch because my husband has a long torso.
- Widen bottom band 3.5 inches to fit the new bodice width.
- Lengthen front band by 2 inches to accommodate the added bodice length.
If you’re not comfortable with doing alterations like that you could also use a pattern you know fits correctly and make the adjustments using that pattern.
To make the Cardigan more my husband’s style we used this pic as inspiration. He wanted a yellow stripe though rather than a white one.

We used a Dark Gray Ponte Roma Knit we found at Joann’s for the body of the cardigan. When I was getting it I found out it was discontinued so I bought it all.
Here’s how I added the stripe. I used Ponte Roma Knit because it doesn’t fray or roll so there was no need to hem it which made this part super simple. Using my rotary cutter and mat I cut two 20×1 inch strips of fabric, just to be sure I would have enough.
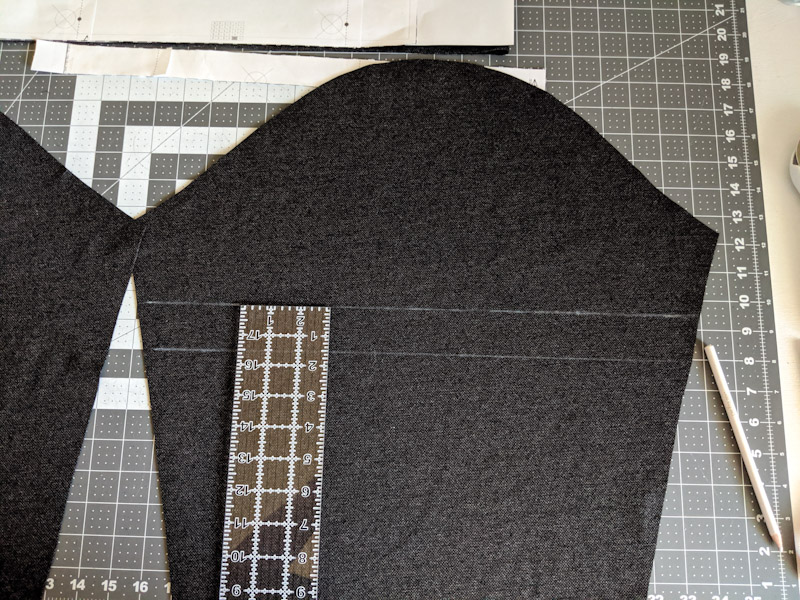
Then I marked 2.5 inches down from the armpit on each side of the sleeve and connected the marks with a line. From that line measure I.5 inches down and make another line. I used the lines as guidelines to lay the top of each stripe on. This made there be a 1/2 inch gap between each stripe which we thought was perfect.
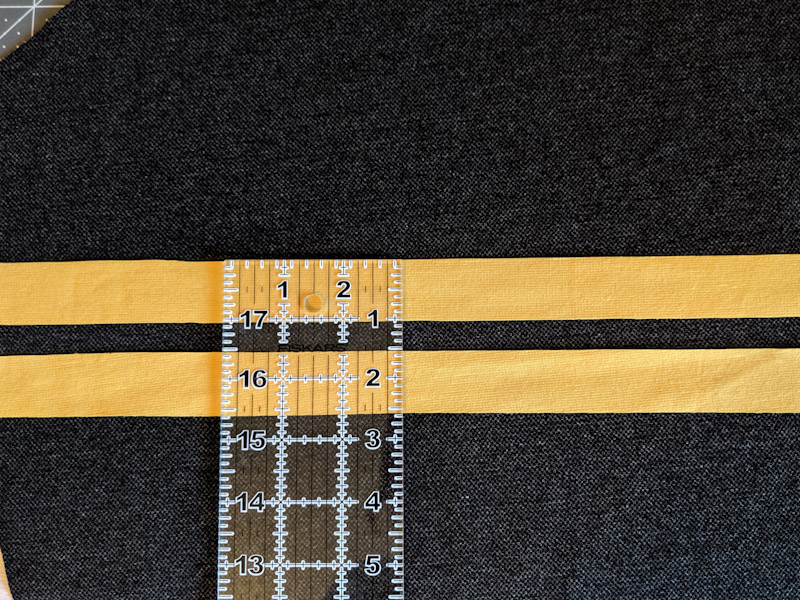
I used fabric glue to attach them to the sleeve before I sewed them on. This kept them from shifting which in turn made them super straight.
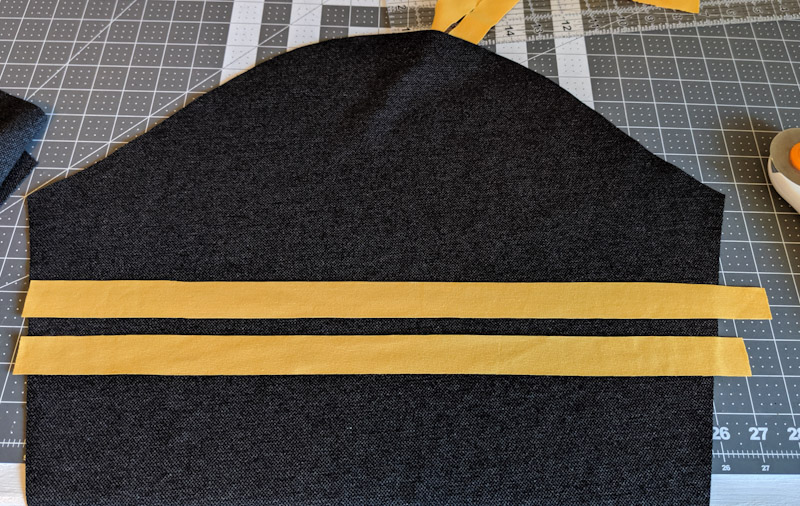
Once the glue was dry I sewed the top and bottom edge of each stripe.
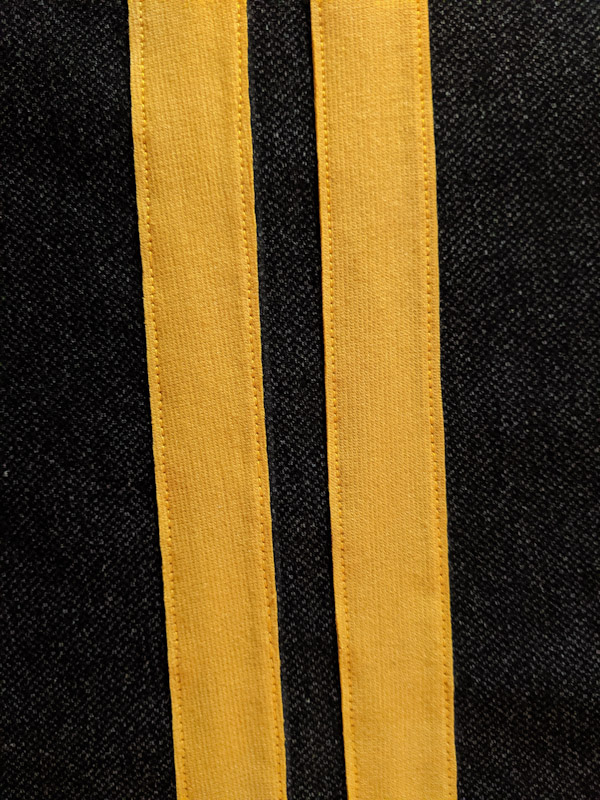
There ya go! Super easy! Maybe on our next one we’ll decide to do the super sophisticated elbow patches again. For now, we’re really digging these stripes.

My oldest loved my husbands so much that he asked for one too only with red stripes.

Also he wanted it before he left for October break. I aim to please so I quickly sewed one together before he could change his mind.
He loves it too!