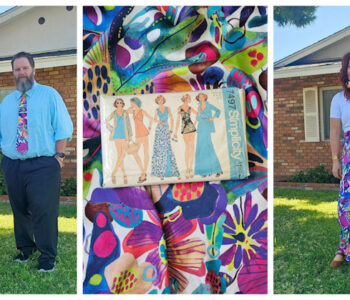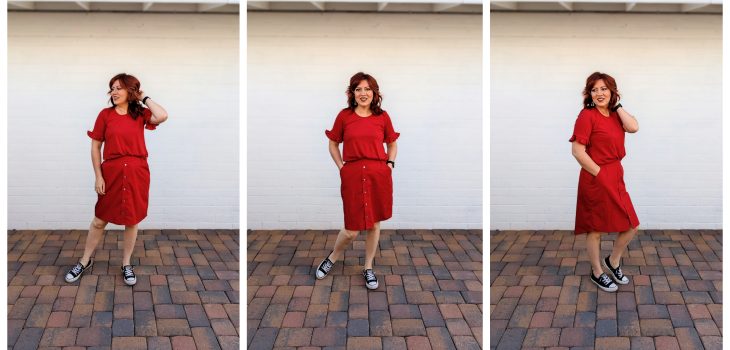
Red Button-up Shirt Refashion
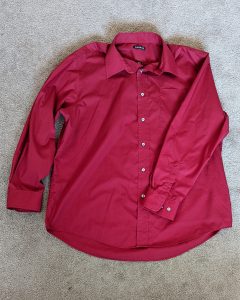
I’ve had an idea in my head for a while to refashion a button up shirt into a skirt with a button panel. This red shirt was the perfect shirt to do this with. I love using button up shirts for refashions. There is so much fabric to play with. Plus, the button placket can be used as a design detail.
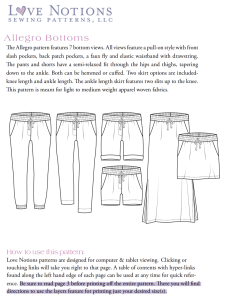
The pattern I used for this is the Allegro Skirt by Love Notions Patterns. If you would like to get this pattern, I will have a discount code for you at the bottom of this post.

I actually had a different pattern in mind that I wanted to use. Its pieces weren’t quite working out how I needed them too so I grabbed the Allegro skirt pattern instead. It had fewer pattern pieces and was a more simple pattern. Fitting the Allegro pattern to the shirt was much easier.
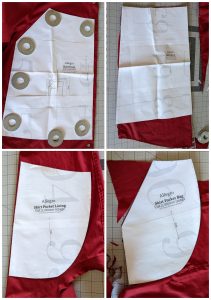
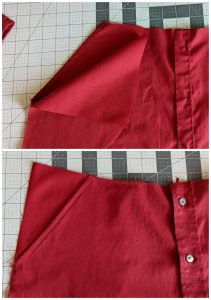
I knew from the start that I wanted to keep the button placket. To do this I placed the front pattern pieces right where the buttons met with the buttonholes.I cut the back of the skirt from the back of the shirt, leaving the shirt hem. The Pocket Lining and Bag were cut out from the sleeves.
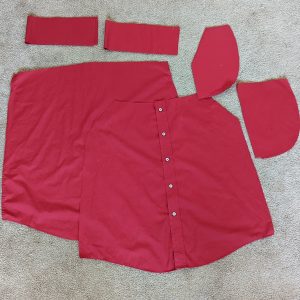
The waistband was cut out from the leftover shirt scraps. I actually made it twice as thick as the pattern calls for. Folding it over was what I had in mind. You can see from the above picture that I didn’t cut the length of the skirt the same as the pattern. I left the original shirt hem for now. I was still undecided on length and hemline shape so I was going to wait until I finished it and tried it on.
There was a pocket on the front of the shirt that didn’t fit in with the vision I had for this skirt. I ended up removing it with my seam ripper. Once I had everything cut out it was ready to be sewn together.
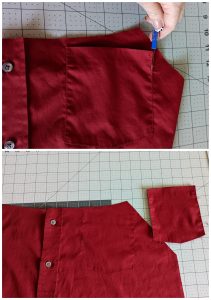
Starting with the pockets, I assembled them to the front of the skirt just like the directions say. These are my favorite pockets to assemble. I often use the Allegro pocket pattern pieces for other patterns that don’t have pockets or have pockets I don’t like. I actually use the Allegro pockets for all of my Sybil pencil skirt makes as well. Once the pockets are done you can attach the front and the back pieces of the skirt.
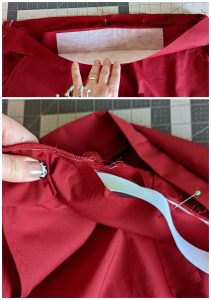
Before I attached the waistband, I fused a 10 inch piece of interfacing to the middle front part of the waistband on the inside. The part with the interfacing was left open so I could insert the elastic part for the back of the waistband.
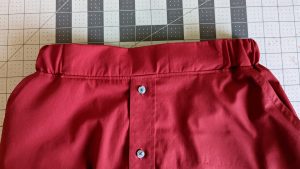
Once I had it all adjusted to the right size for my waist I closed the waistband and did and vertical seam across the elastic. Now the front waistband was flat and the back was gathered. I love the flat front look. I feel like it’s more slenderizing than having it gathered by elastic. I actually have another post here that has more indepth directions for a flat front.
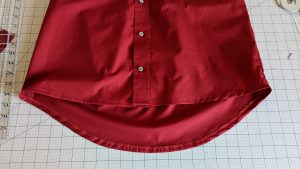
Now for the hem. I liked the curved look of the original shirt hem, but it made it look too much like a shirt. So I cut the front straight across and made the back curve less pronounced than it was. This gave it a cute ‘Hi-low” hem that I really liked. I finished the edge with my serger then turned it under ½ inch and straight stitched it in place. And it was all done!

This whole project took me a little over an hour, start to finish. Even though I had to change my plan at the start I still feel like I was able to get pretty close to the vision I had in mind. I plan on wearing this skirt a lot this Summer.

Refashions are great learning experiences. You can really learn a lot about fabric and garment construction by deconstructing a garment and putting it back together as something else. If you ever wanted to sew I would highly recommend a refashion project.
If you would like to get the Allegro Bottoms or any other Love Notions Pattern you can use code KOE10 for a 10% dicount.