
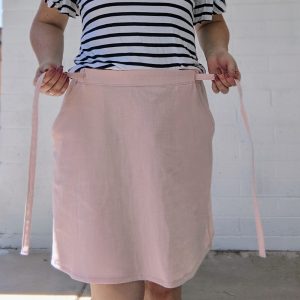
Flat Front Skirt: Simple Hack for an Elastic Waist
I love waist ties and drawstrings but I hate doing buttonholes. I also am not super crazy with the look of pants being gathered across the front of my waist. I feel like it adds bulk. Plus I like the look of a flat front waist better than a gathered front waist.

For this particular hack I am using the Allegro skirt by Love Notions Patterns. I love this pattern because it has so many options. You can use any elastic waist pattern for this particular hack though. But if you want this pattern you can get an extra 10% off by using code KOE10 at checkout.
Now, for reference my measurements are:
Waist- 31 inches
Hips- 41 inches
That puts me in a size 12 for the Allergro Pattern. The fabric I’m using is a cotton double gauze from D&H Fabrics.
Before you start, make sure you have read through and are familiar with the Allegro assembly directions. After I cut out all my pieces. I sew everything according to the pattern directions except for one small thing during the waistband assembly. Before you fold the waist over to make the elastic waistband casing, you iron on some thick, fusible interfacing to the front middle section of the waist area.
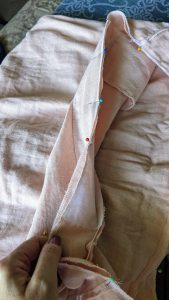
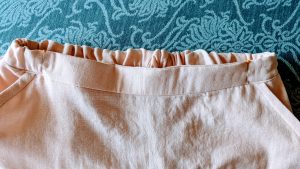
Iron it to the wrong side of the fabric in the front area so that when you fold the top over, the interfacing is completely covered. For reference my interfacing piece was 12×1.5 inches. I fused it to the middle point between my front pocket of my skirt. That’s also how I decided how long to make the interfacing. You can see the interfacing already attached in the picture below before I enclosed the front. Ignore the elastic in the skirt. I was almost done with this project when I realized I should probably take this picture.
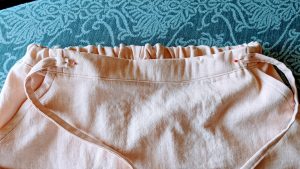
Now for the flat front part. The picture below shows the 12 inch area between the pockets where the interfacing is in. That area is left open on the inside for now. To create the waist casing for the elastic, sew from one pocket around to the back and to the other pocket leaving the front part unsewn. The elastic will only be inserted into the back portion.
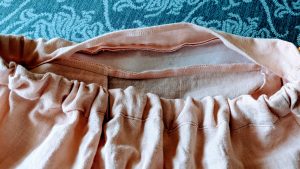
To figure the elastic length I took my waist circumference, subtracted the unsewn area between the two pockets and then subtracted two more inches. Yours may be a little different so you may want to give yourself a bit more elastic to be safe. Then cut your elastic to the size you have determined and insert it in one side and around to the other. Pin it in place on both ends with safety pins and try them on to make sure they fit. Once satisfied, stitch the elastic in place with a vertical stitch across the elastic. Then enclose the waist casing area that was left unsewn. Your skirt should look similar to the picture below now.
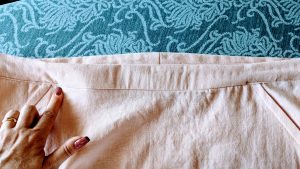
My pattern calls for a drawstring but I didn’t want to add that because it woud bunch up my flat front. I still wanted my skirt to have ties though so I made some. You don’t need a pattern piece to do this. For reference, mine unsewn were 17.5×2 inches. Pin them to where you secured your elastic in place and stitch them to the waist.
Then fold them back over the raw edges of the ties and stitch them again using a narrow zig-zag stitch to make them more secure. You can finish it off by tying it in a little bow. The great thing about this method is you don’t have to untie it to get the skirt on and off. This little bow can stay tied.

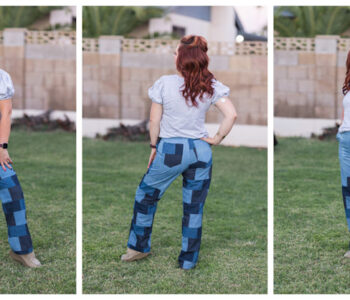
I think it would be super cute with a thicker waistband and ties too. You could change it up all sorts of ways. I love this pattern because it has so many options than just a skirt.
- 4 lengths: full length, cropped, 9″ shorts, 5″ shorts
- 2 skirt lengths: knee & ankle
- Jogger option
- Optional cuffed shorts
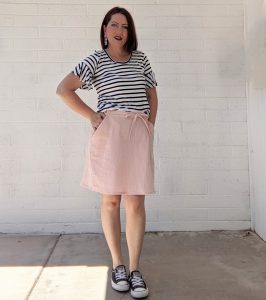
You can throw this on with some sneakers or heels just depending on your mood.
I hope you liked this simple hack for an elastic waist skirt. Let me know in the comments your favorite way to change up a simple elastic waist pattern
Happy sewing and pattern hacking!
Koe


2 COMMENTS
Great content! Keep up the good work!
Thank you so much for stopping by.
Comments are closed.