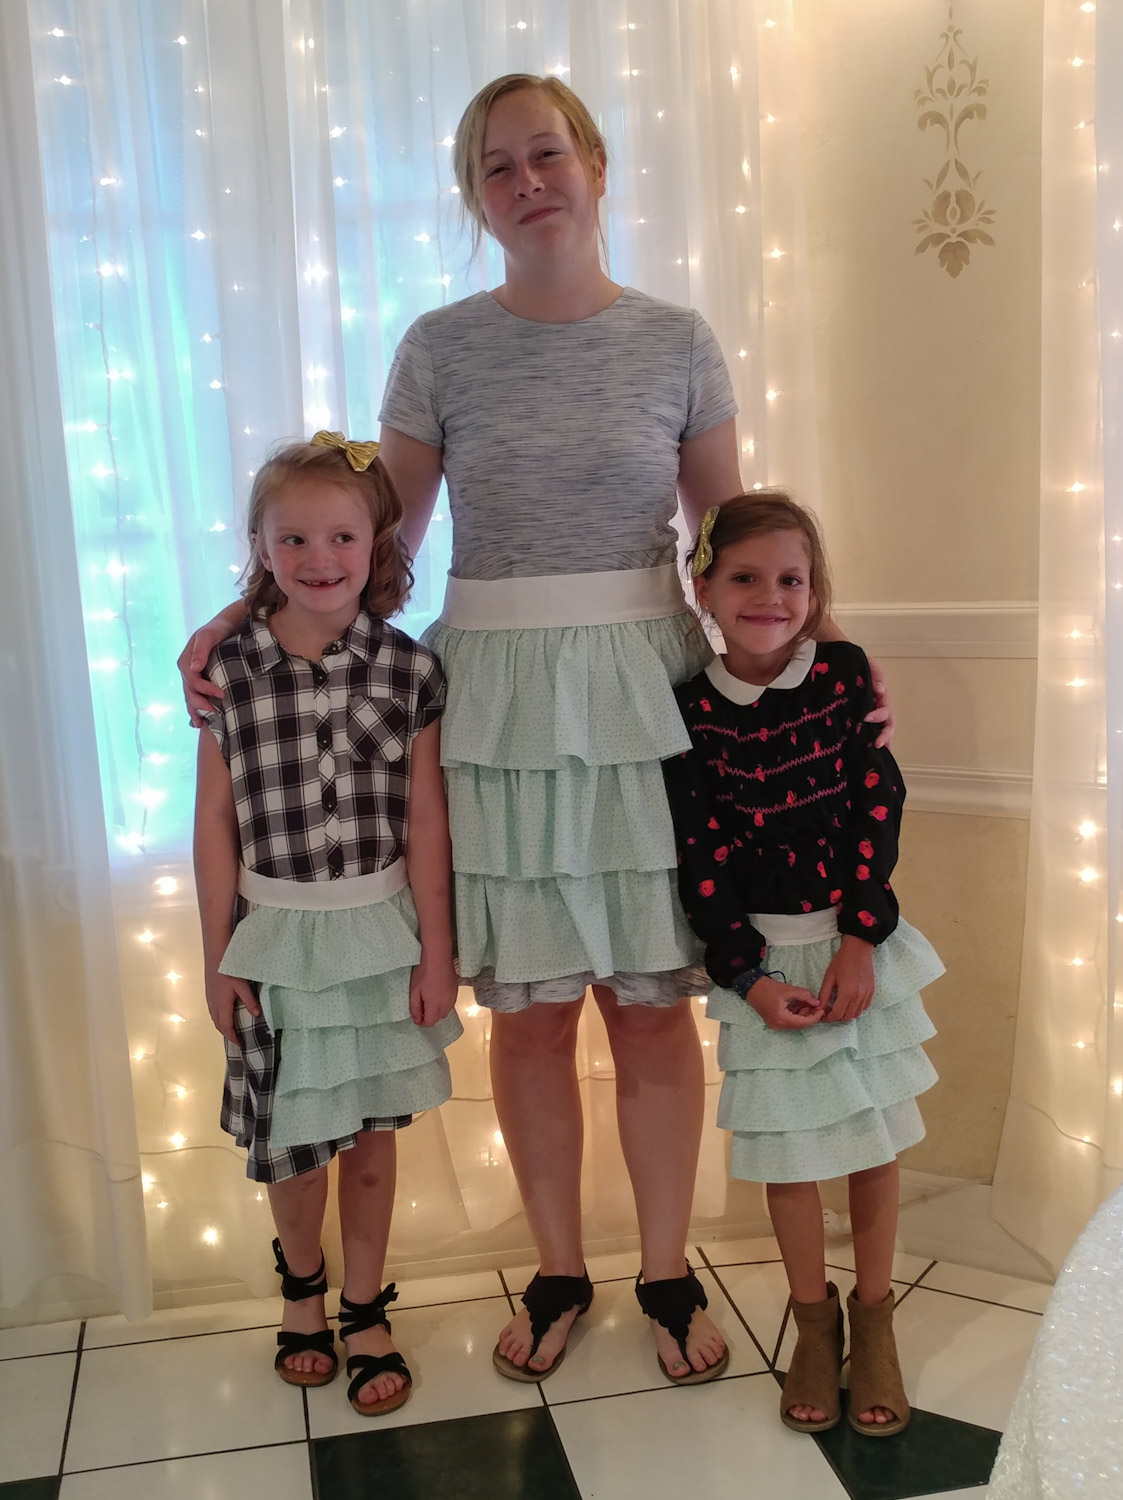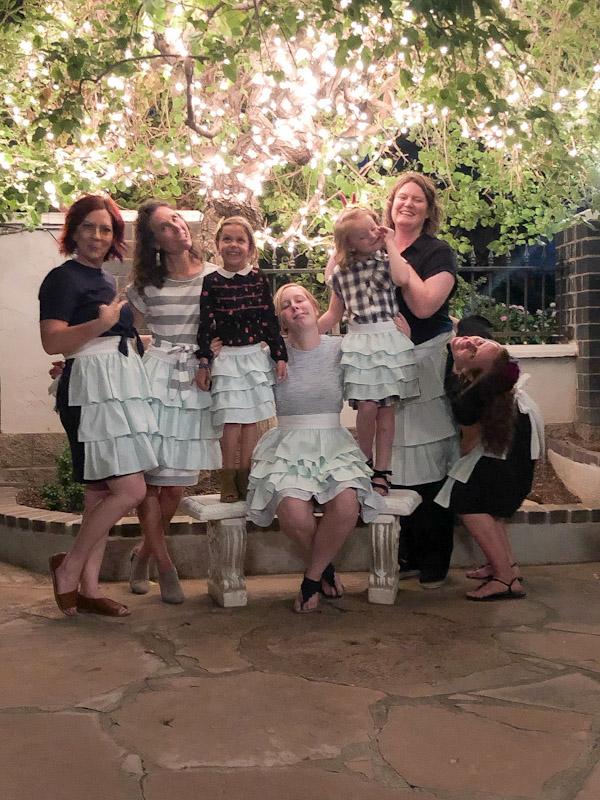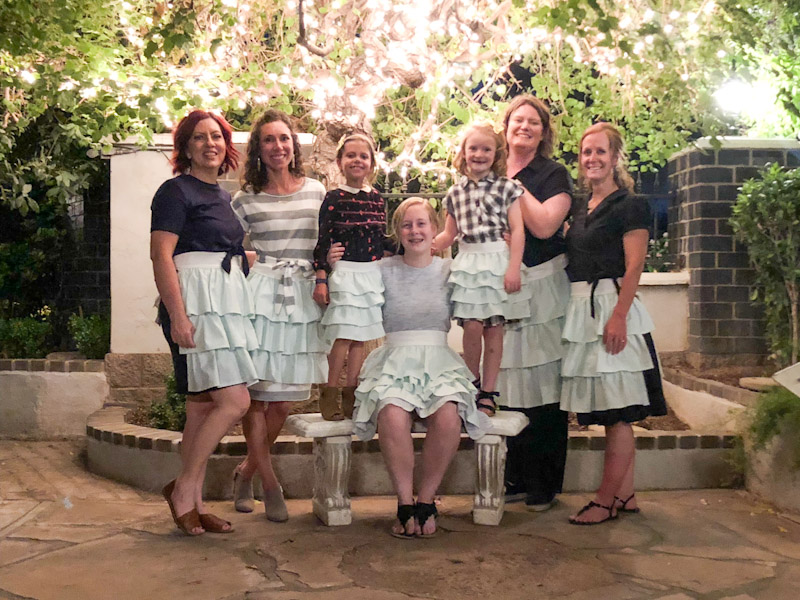
Mom and Mini Matching Aprons
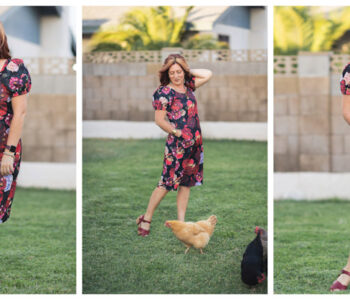
If given the opportunity to match my girlfriends for a whole night, I say yes every time. My husband and boys have no problem throwing on a tie or coordinating shirt to match me for Church or the occasional party. But to dress up in frills or ruffles and match a friend dressed the same doesn’t happen to me very often. So when my sweet friend asked my friends and I if we could help out in the kitchen for her daughters wedding, my answer was: “Only if we can wear MATCHING aprons.” Just kidding. We love helping at weddings. The matching aprons were just a sweet bonus. The mother of the bride bought the material and let me have free reign. So ruffles were really the only way to go. I mean if you have to wear an apron, you might as well look cute in it.
The aprons weren’t hard to make. Just a little time consuming to gather the ruffles. You can adjust these measurements to fit your size. Here’s how I made them.
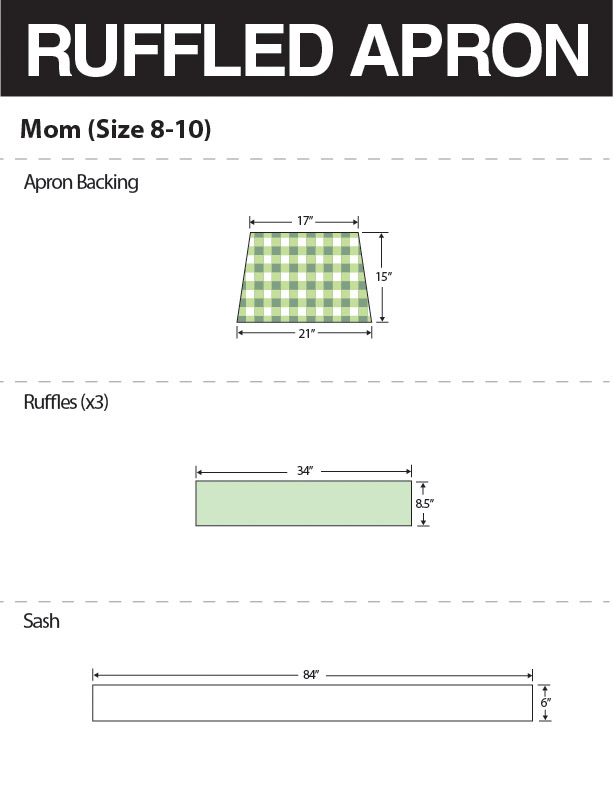
These are the measurements I used for an adult apron in a size 8-10
These are the measurements I used for a kids apron size 6-8
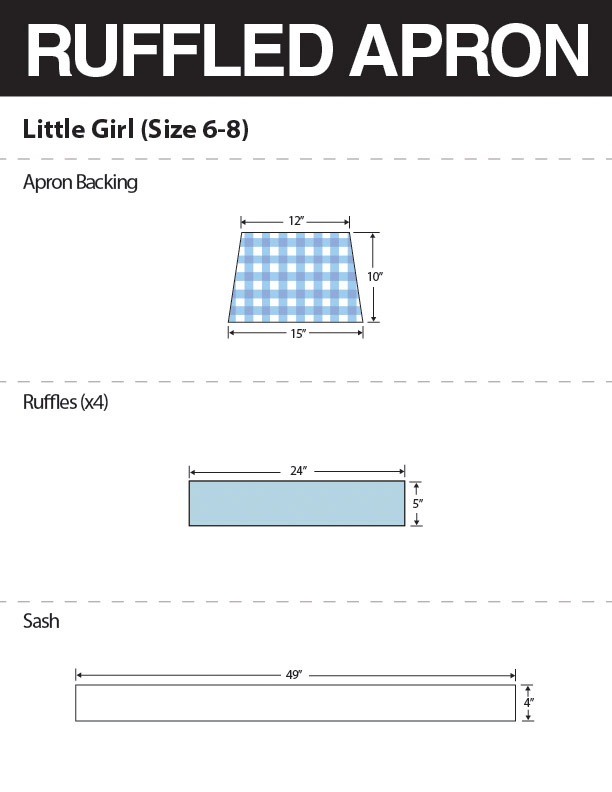 Using the above measurements cut out all you pieces. Adult : 1 Back, 3 Ruffles and 1 Waist Sash. Kids: 1 Back, 4 Ruffles, 1 Waist Sash.
After you cut all the pieces, finish the edges to the backing with either a zig-zag stitch or a serger.
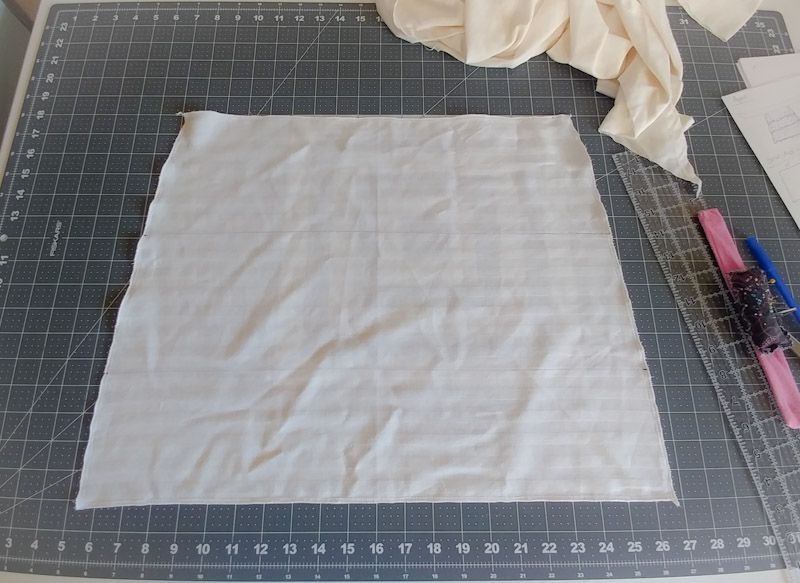
I used an old cotton table cloth I never used.
Next finish the edges of the ruffles using a zig-zag or serger. Then hem one long side 1/4″ on each one. This will be the bottom of each ruffle. The top side doesn’t need hemmed because it will be gathered.
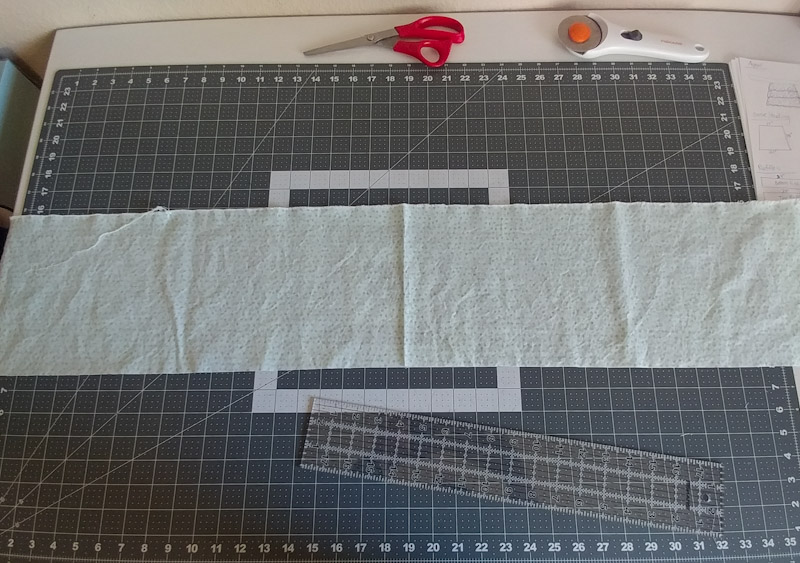
I didn’t bother hemming the sides of the ruffles because I used a serger. I just turned them under 1/4″ and ironed them. If you want to, you can turn the sides under 1/4 and stitch that. It’s gathered so it wont be super noticeable. It’s just preference.
On each ruffle, sew a basting stitch to the long side you didn’t hem and gather your ruffles. Or gather it in your preferred method.
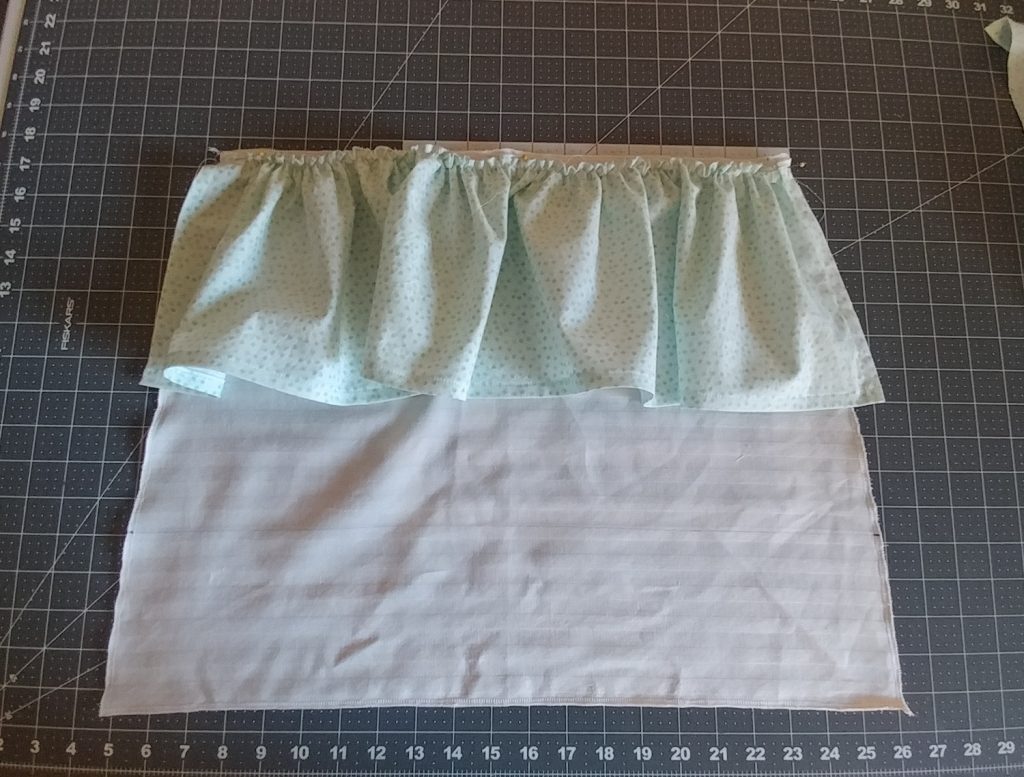
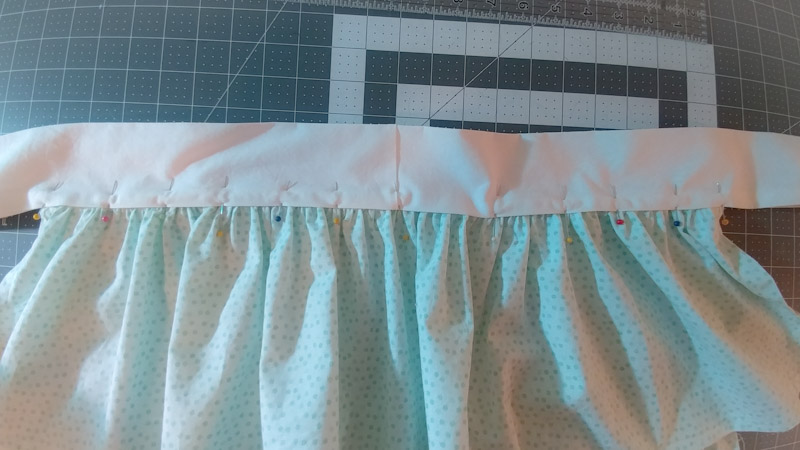
For the adult apron I placed a small dot on each side of the backing every 5 inches. I then drew a line attaching the dots so that I had a straight line to follow for attaching each ruffle. You can see it on the above picture. For the little girls apron I placed a dot every 3 inches on each side and drew a line to follow. Attach each ruffle along each line making sure the top ruffle over laps the one under it 2-3 inches for the adult and 1-2 inches for the little girls.
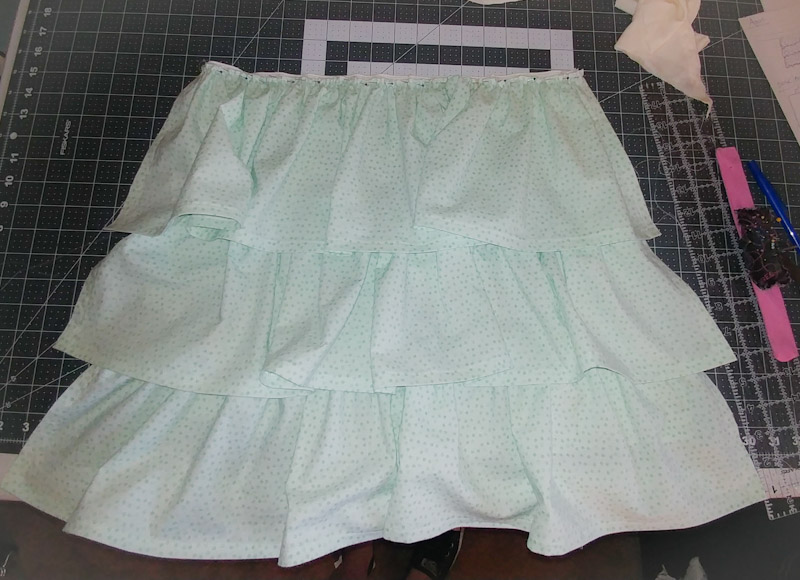
Once all the ruffles are sewn on you are ready to do the sash.
For the waist sash I had to sew together two pieces of fabric of the same length to make it long enough. I just made sure that the seam was placed neatly in the middle front. I didn’t bother finishing the edges of the sash because they were all going to be enclosed.
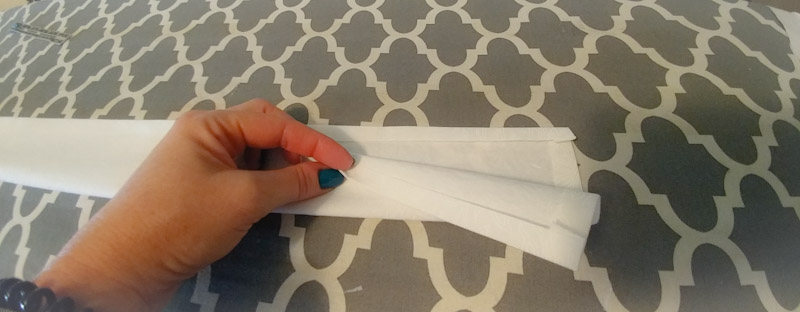
Then, using and iron and steam I turned ALL the edges under 1/4″. Next I folder the sash in half and ironed again.
I marked the middle front of the apron and matched it to the middle front of the sash.

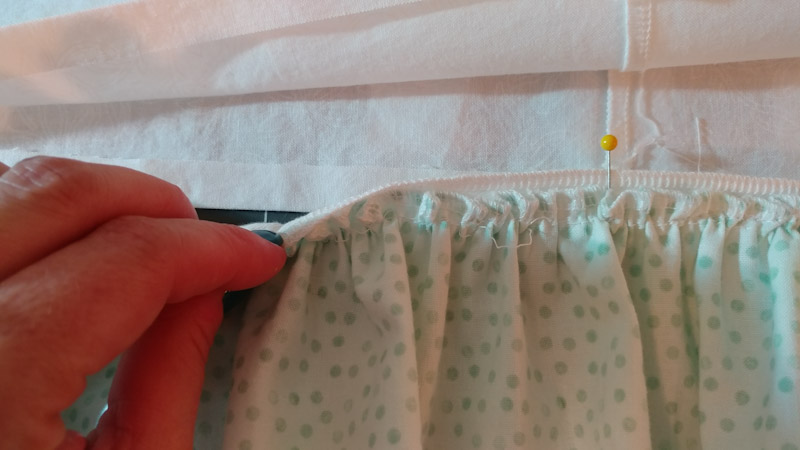
I pinned it in place right at the 1/4″ ironed edge of the sash.
I sewed the sash from one end to the next making sure to sew the ends of the sash closed.
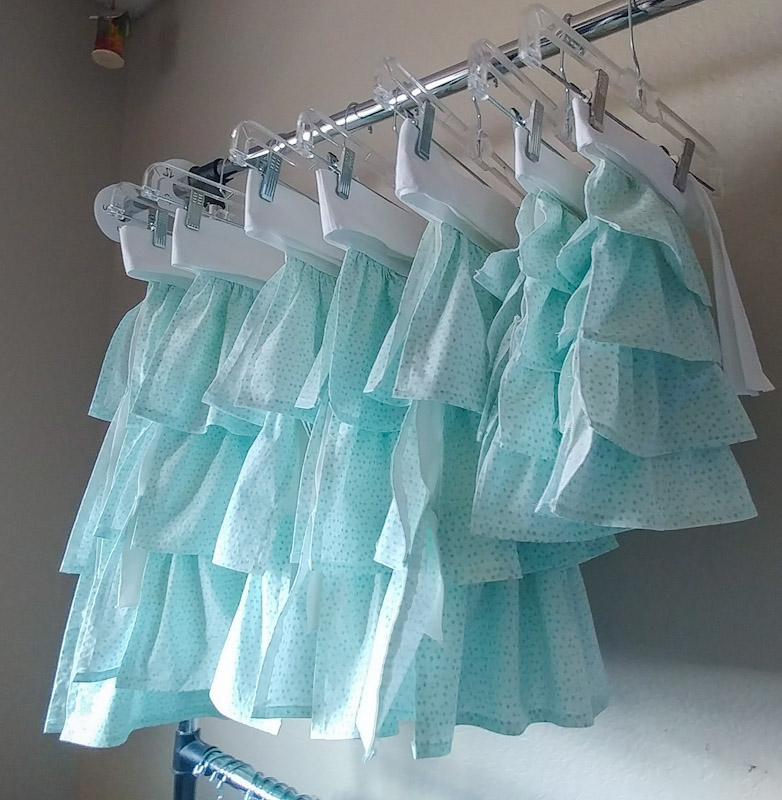
You’re all done! Now repeat 6 more times and you have enough to give to your friends and their daughters.