Maxi skirt to Peplum shirt!
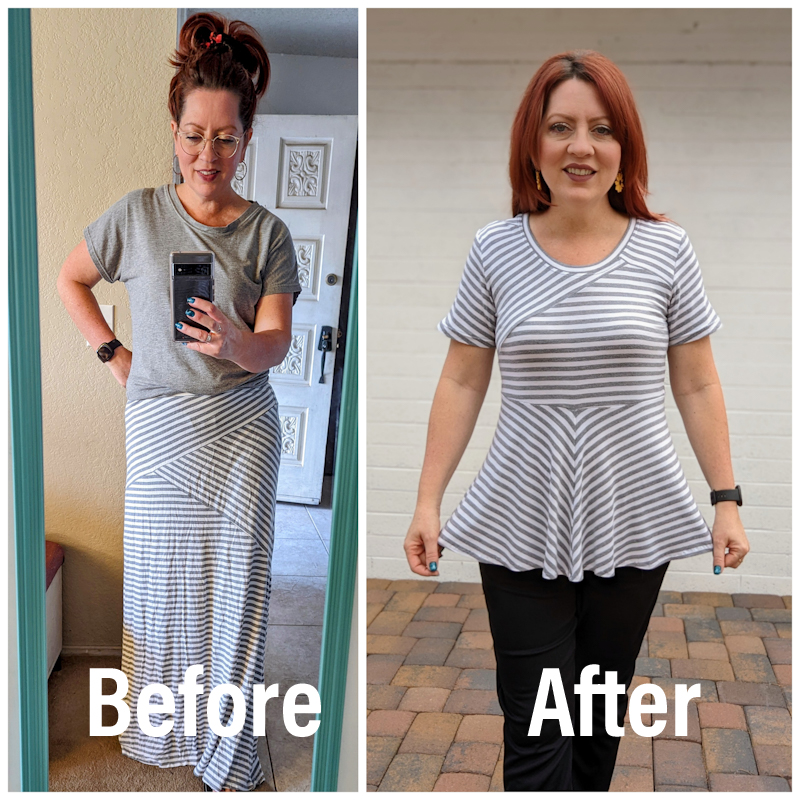
When I walk through thrift stores I see endless fabric and loads of possibilities. It’s so satisfying to take something and turn it into something elses. It’s no secret that refashioning clothes is one of my favorite things to do. I also love peplum tops, thanks to Covid. So I thought I would start the year off with a fun Maxi skirt to Peplum top refashion!
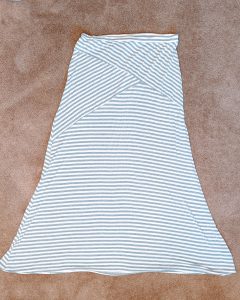
I found this Mossimo maxi skirt in my size at a thrift store for $2. Maxi skirts are great to use for a refashion because they are made with so much fabric. This one in particular was a size large and extra long so I had even more fabric. I typically wear a size M-L in ready to wear clothes. Something I always try to be mindful of is the sizes offered at thrift stores. I don’t refashion things that are out of my size range. Bigger sizes seem to be limited and I don’t want to take and refashion something from a bigger size range because those things are harder to find. If I don’t think I can make something work in my normal size, I don’t purchase that garment.
I normally don’t like buying striped clothing though, because the stripes are usually cut off grain and never match up. However, I really liked the design detail on the front and back of this skirt. I thought it would make an interesting refashion.
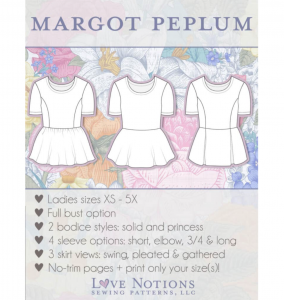
For this refashion I used the Margo Peplum top by Love Notions. The Margot Peplum Top is a fun, easy to sew, knit top. Included are three skirt styles: gathered, swing and pleated. As well as two bodices: princess & solid. Four sleeve lengths are also included: short, elbow, 3/4 and long. So many different styles to mix and match! The Margot Peplum Top is a sophisticated style, flattering on most figures. The bust and waist are meant to be fitted with plenty of ease in the hips. This peplum pattern hits above the natural waist.
Margot Peplum Top Features:
- Meant for knit fabrics
- 2 bodice styles: solid & princess
- Three skirt styles: swing, gathered and pleated
- 4 sleeve options: short, elbow, 3/4 and long
- Full bust option
Sizes: XS-5XL (See Size Charts here)
Skill Level: Confident Beginner
Use code KOE10 at check out for 10% off!
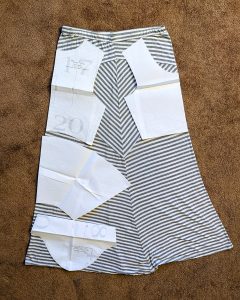
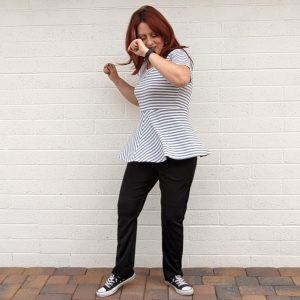
The shirt bodice pieces are cut on the fold. I matched up the skirt side seams so that the skirt would be folded in half and the fold edges would be on the front of the shirt where the design was. That way I could make the most of that fun design detail and hopefully have it look a little asymmetric.
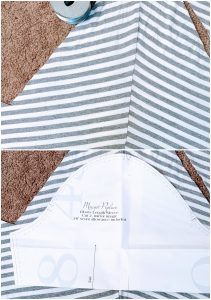
I had plenty of fabric to work with and thought I would just cut the sleeves out with the stripes going horizontal like I show in the picture. Then I thought about the different way the stripes were meeting up and changed my mind. I kind of liked the look of all the seams so I decided to cut my sleeve out on the seam. If I would have done it horizontally I would have been picky about all the stripes matching and the sleeve stripes being the same on both. With the seam going down the center of the sleeve I didn’t care so much. I just looked at the seam as more detail to bring the design together.
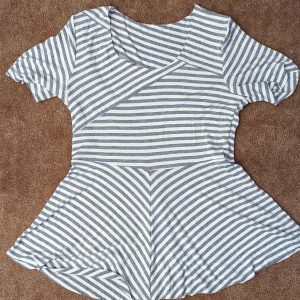
When I sewed the peplum ruffle together, I noticed that the side seam stripes matched and formed a V-pattern. Normally that would be on the side, but I loved it so much I thought it would look better if it was down the front. I feel like it suited the shirt more. I kind of like all the different directions the lines are going. It makes this truly a one of a kind shirt.
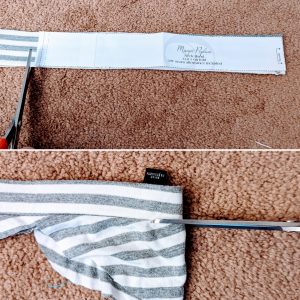
The skirt waistband just happened to be the perfect width for the shirt neckband. I just had to remove the elastic and cut it to the right length.
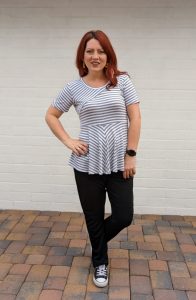
This shirt refashion wasa super easy and came together in about an hour. It was so quick in fact that I threw together a new pair of Resolution bottoms to wear with it! I couldn’t be more pleased with how this all came together.

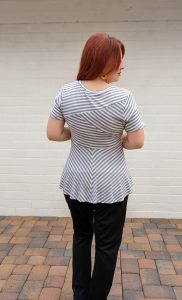
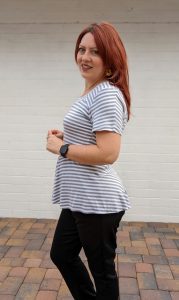
From the stripe design on the front and back, to the sleeves, down to the peplum. It’s all so fun and original!
