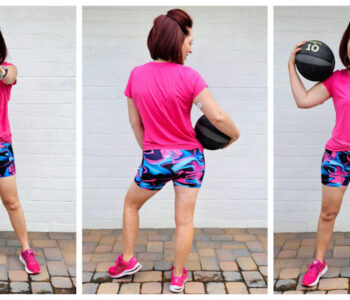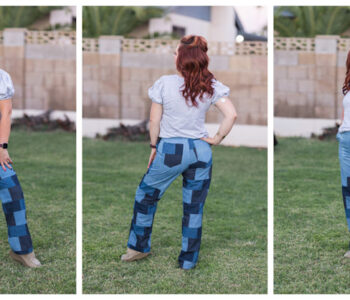
Adding Pockets to Biker Shorts!
During the warm months I need simple comfort. For that reason I rely heavily on Leggings, skirts and dresses. So when I saw the Erinus Biker Short pattern by Mood I absolutely had to try it. First of all, it’s free! Second, biker shorts are just short leggings. What more could you want?
Pockets you say? I got you covered. Let me show you how to add pockets to this FREE pattern. It’s so easy I’ve already made 3 pairs!
Grab Your Supplies!
For this tutorial you will need:
- the Erinus Shorts pattern
- some tracing paper
- something to write with
- a ruler
- scissors
- 1 yard of double knit fabric total(or two cuts of contrasting double knit fabric)
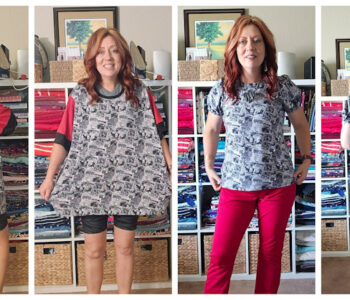
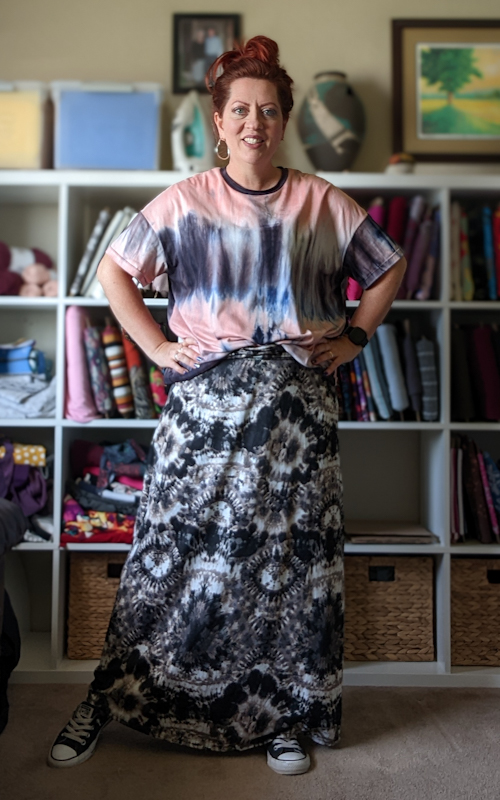
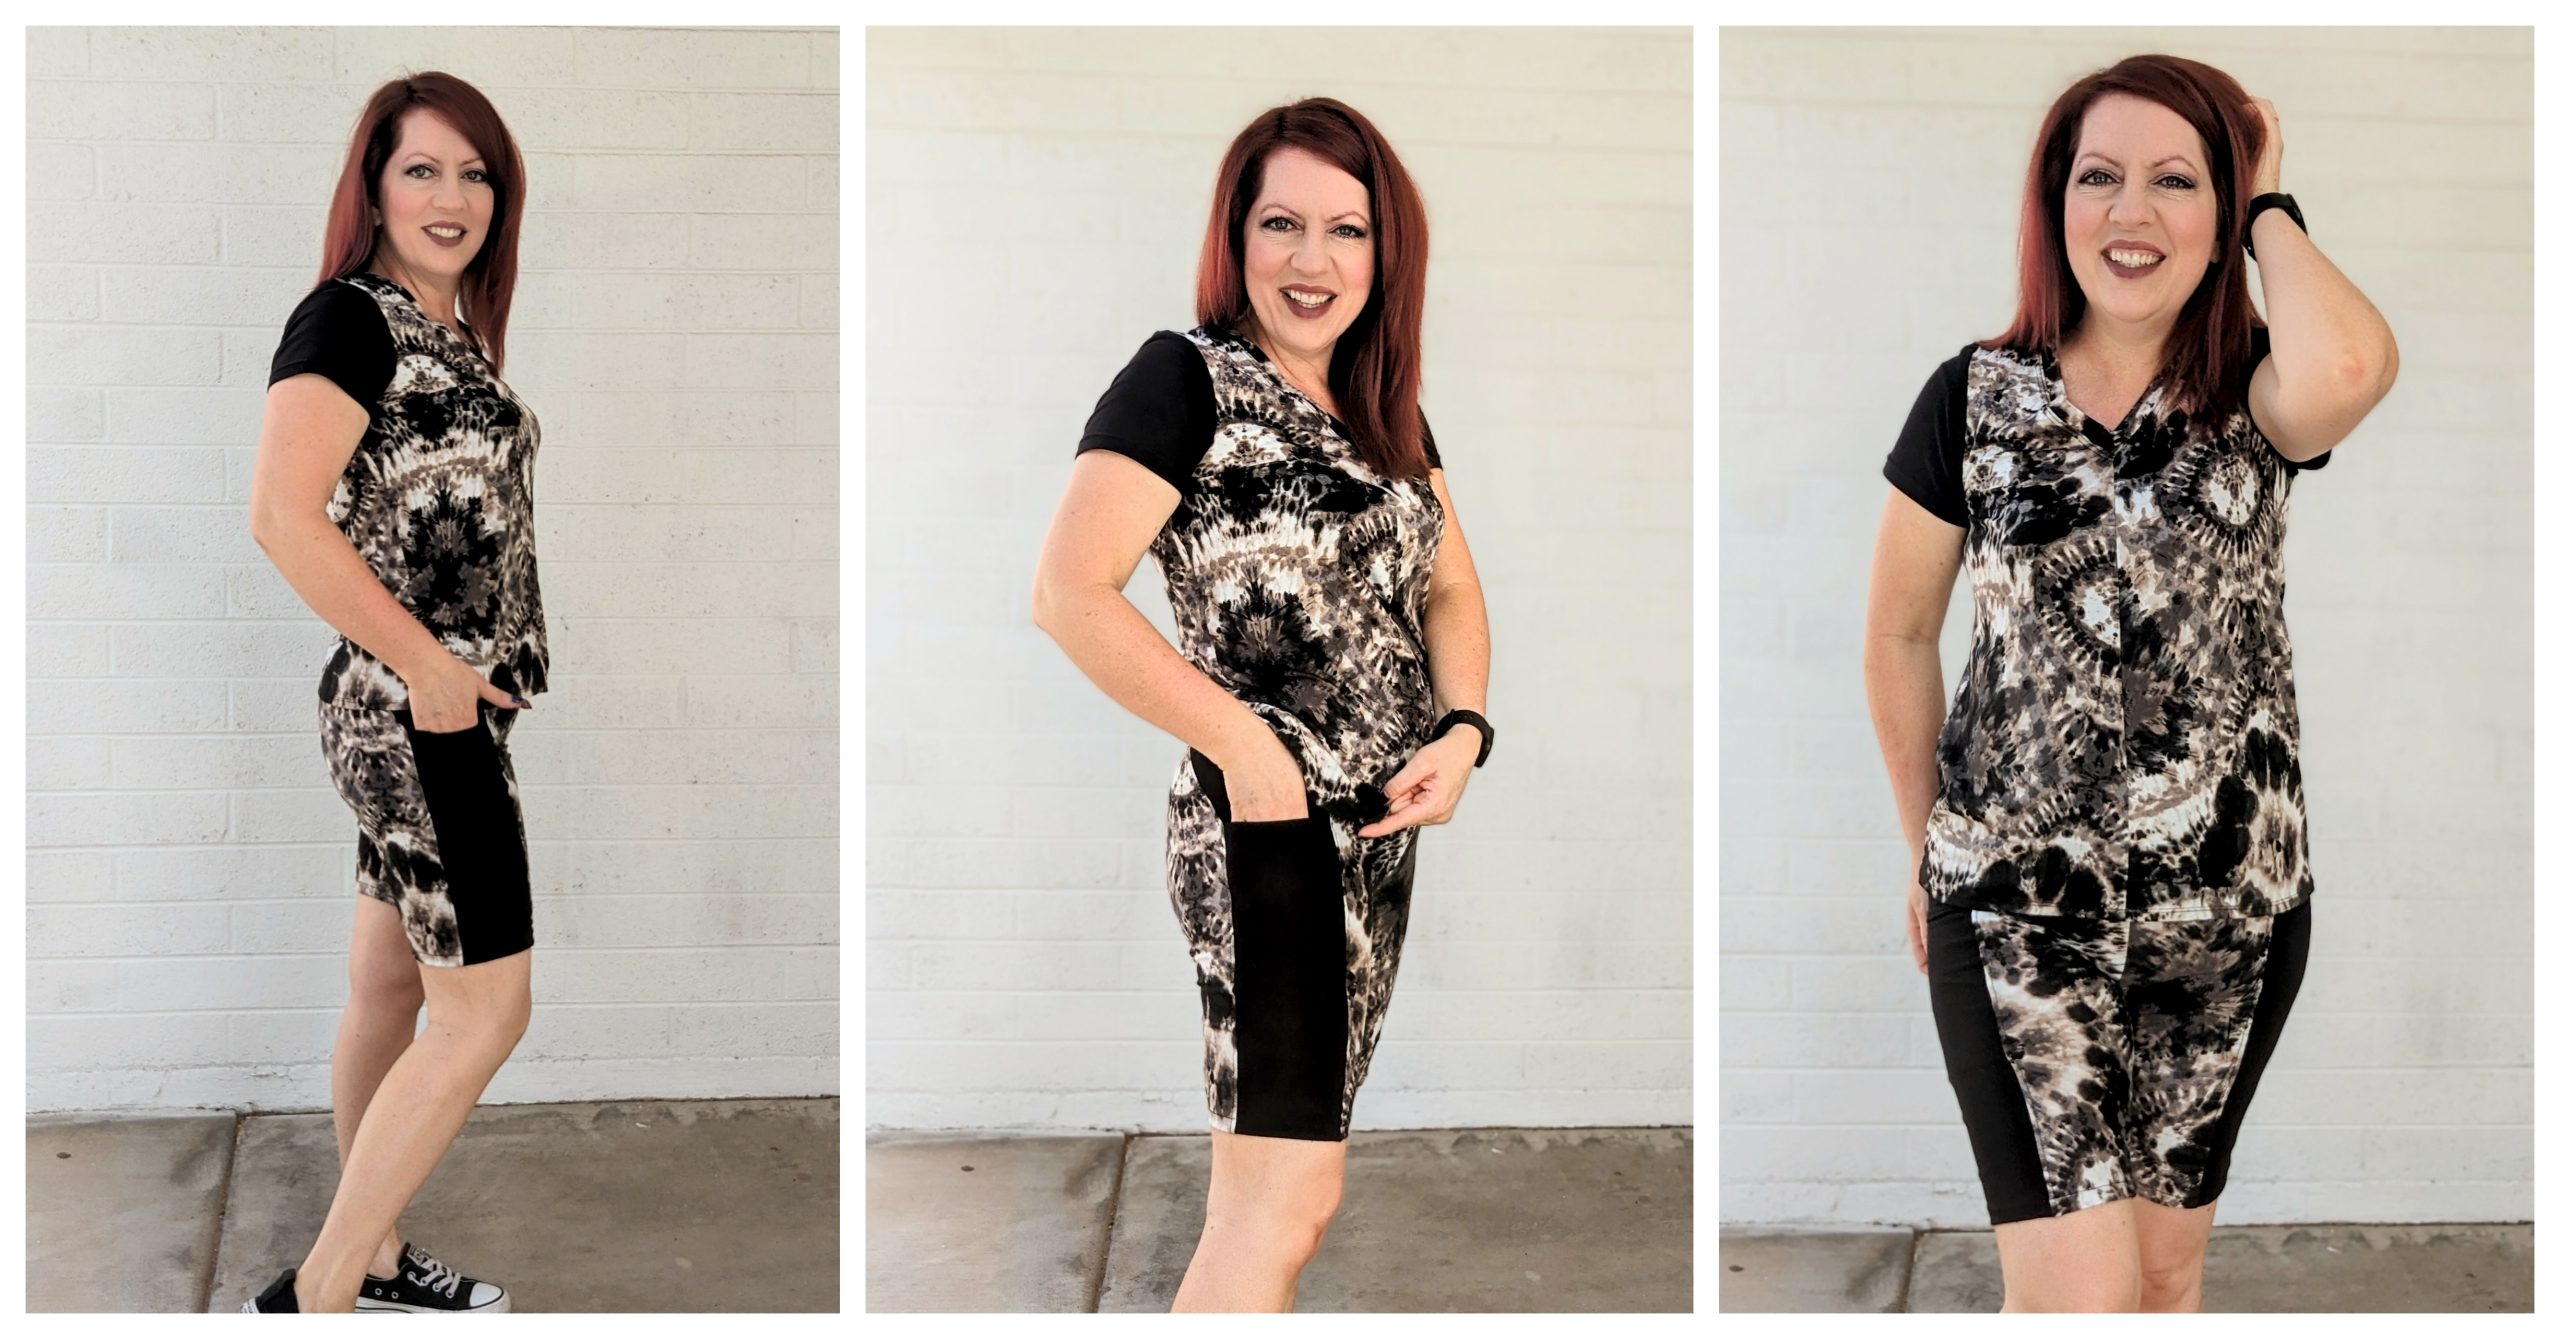
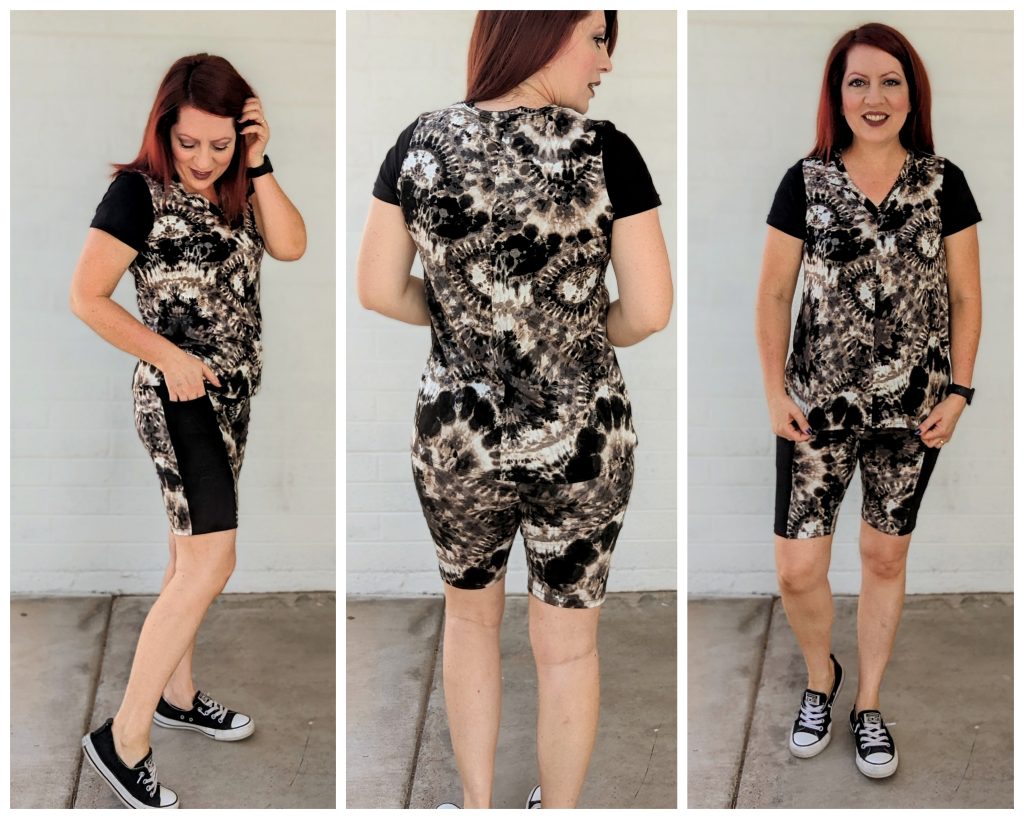
This matching set literally cost me nothing. NOTHING. I made the Shorts and Shirt from an old, knit maxi skirt that’s been collecting dust in my closet.
I used some scraps from my scrap bin for the shirt sleeves, the waistband and the shorts pockets/panel. You could easily use an old t-shirt if you don’t have scraps.
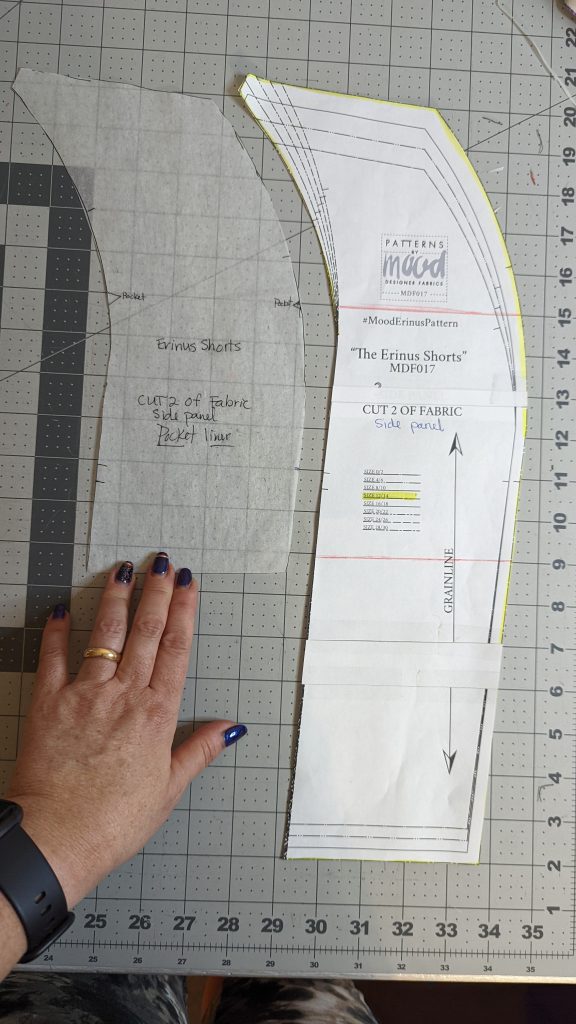
Let’s Hack the Side Panel!
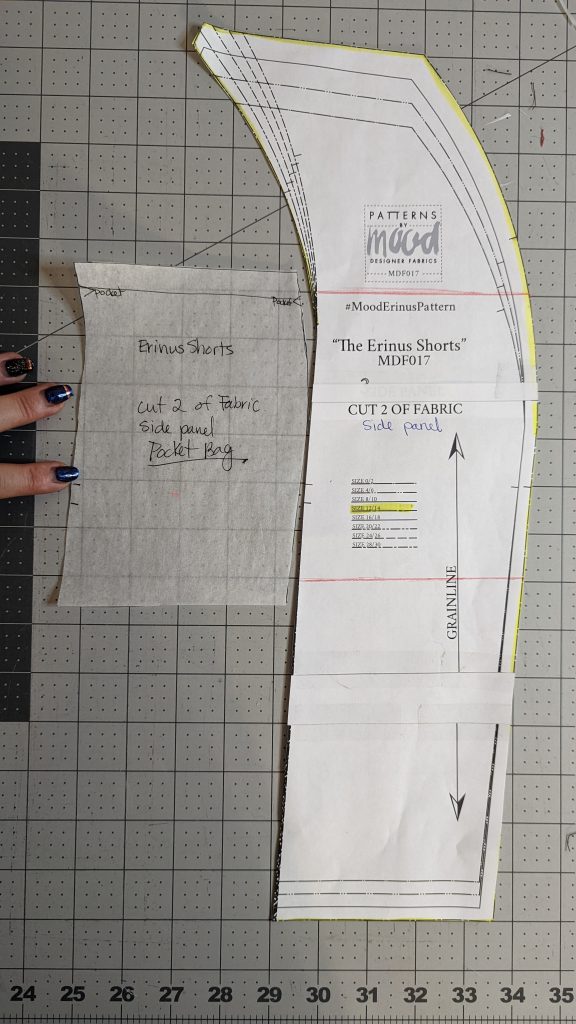
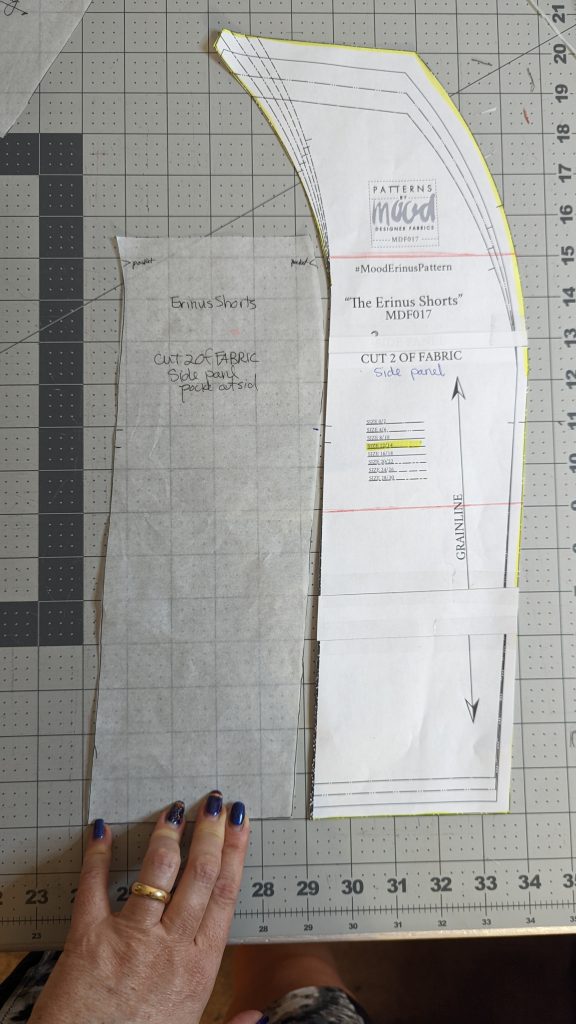
So first, I had to make the pocket pattern pieces. There will be 3 piece that will be layered ontop of each other to form the pocket and side panel
 The pieces will be labeled: pocket bag, pocket liner and pocket outside. You will be making those pieces using the side panel. You will need to make sure you are transferring all pattern markings and labeling the new pieces so you know what they are and where they go. You can call them something different than what I call them. This is just what made sense to my brain.

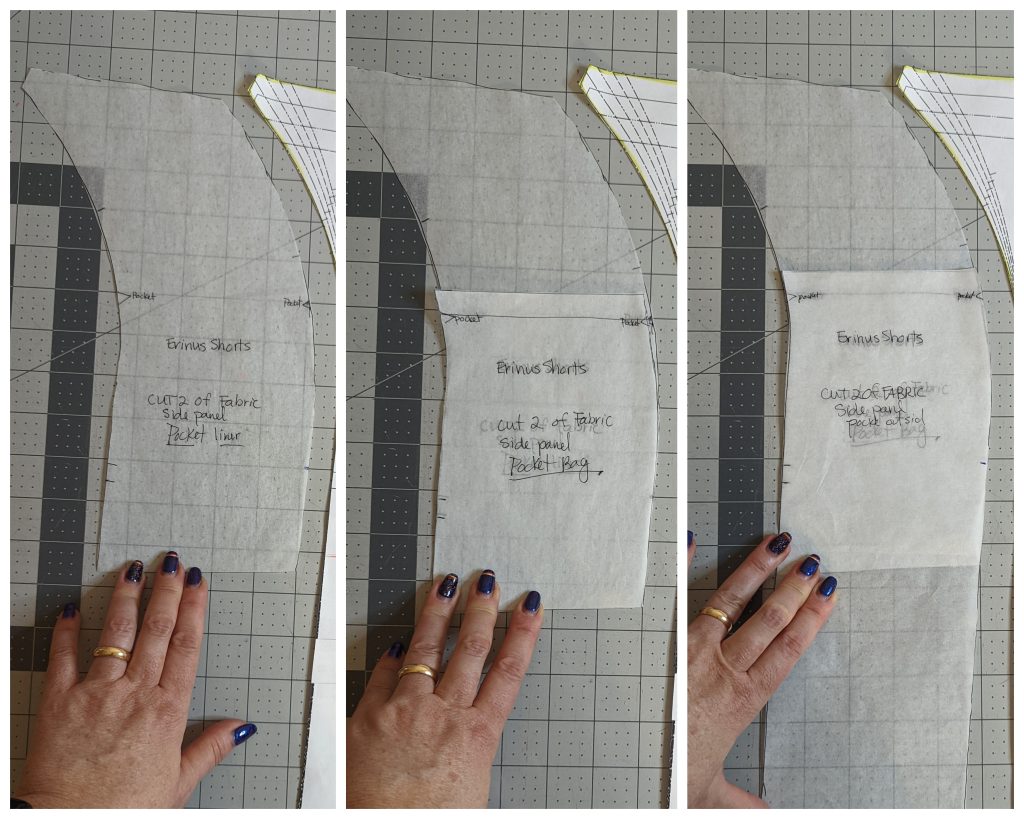
Pocket Bag
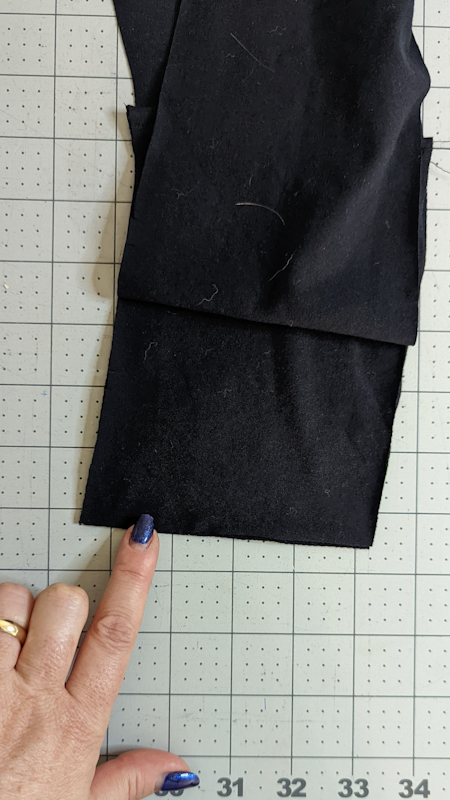
First make the pocket bag piece. This pocket should be big enough to fit a cell phone. Measure 5 inches down from the top of the side panel and draw a line across. This is where the pocket opening will be. Then measure down 6 inches from that line and draw another line across. Trace the piece from line to line and add ⅜” to the top and bottom. Make a triangle marking at the ⅜’ spot to show where to attach to the other pieces. Label this piece “pocket bag” or whatever you choose.
Pocket Outside Panel
Next is the pocket outside. Trace from the top red line down to the bottom of the panel and add ⅜” to the top. Make a triangle marking at the ⅜’ spot to show where to attach to the other pieces. Label it “pocket outside” or whatever you choose.
Pocket Liner
Last is the pocket liner piece. Trace from the top of the side panel to the second red line. Add ⅜” to the bottom. Make a triangle marking at the ⅜” spot to show where to attach to the other pieces. Label it “pocket liner” or whatever you choose.
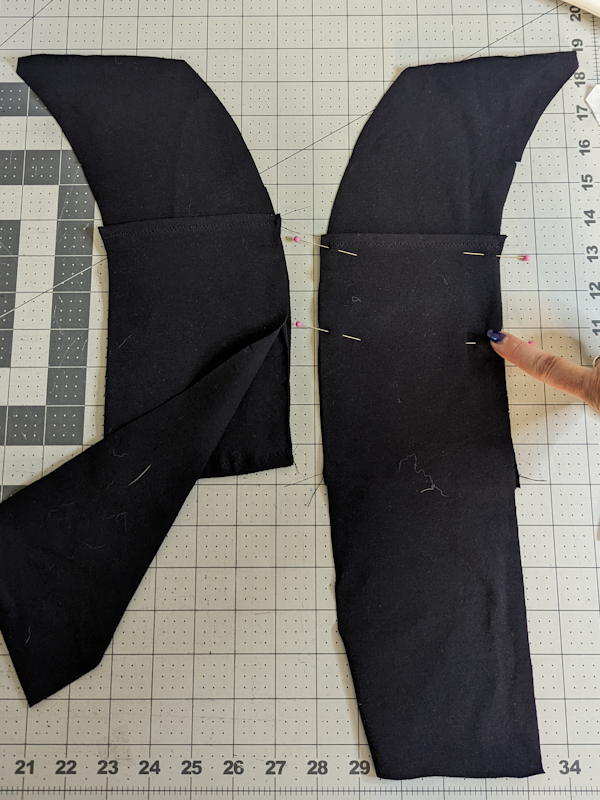
This is how it will layer together: Pocket liner, pocket bag, pocket outside. You need to assemble it in separate steps.
Assembling the Pocket Side Panel!
This is how you will assemble the new pocket side panel once you cut it out:
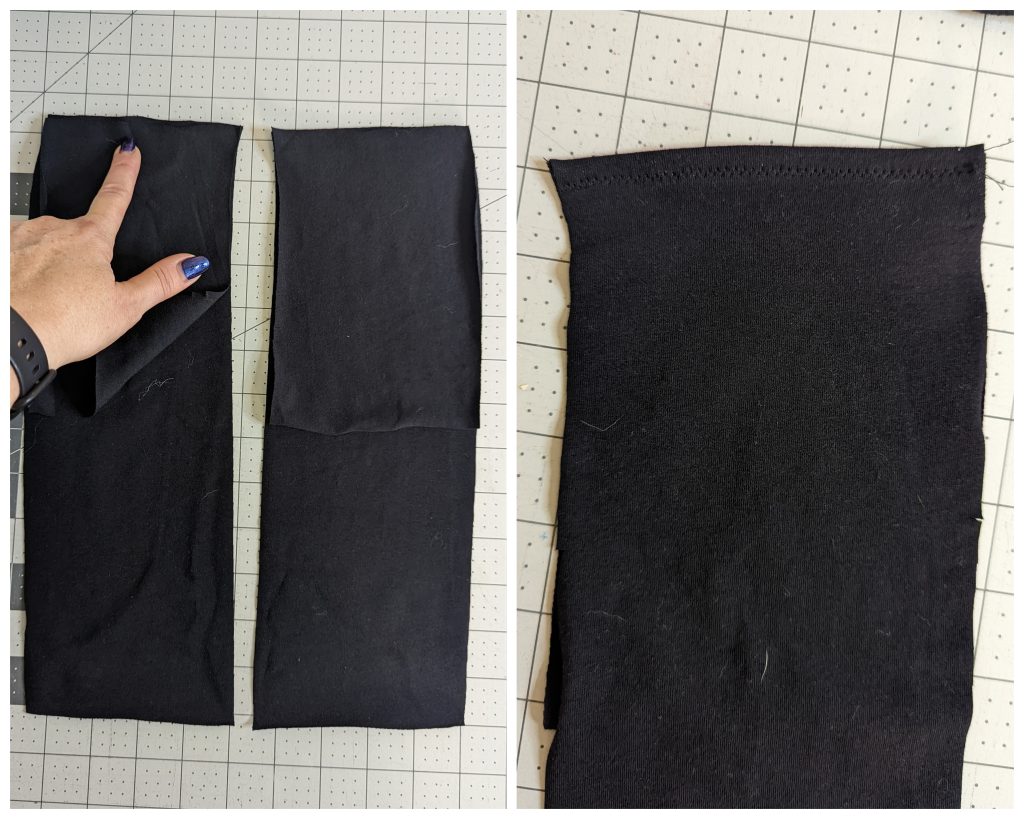
Place the pocket outside and pocket bag, wrong sides together. They should match perfectly along the top edge. The pocket bag will be much sorter than the pocket outside. Thats how you now its right. Use a stretch stitch to sew across the top. Turn it so the right sides are out and do a zig zag stitch across the top to hold the shape.
 Next take the pocket liner piece and place the pieces you just sewed together on top of that. Match up the triangle markings. The pocket bag will be sandwiched between the pocket liner and the outside. The pocket liner will be the same length as the pocket bag.
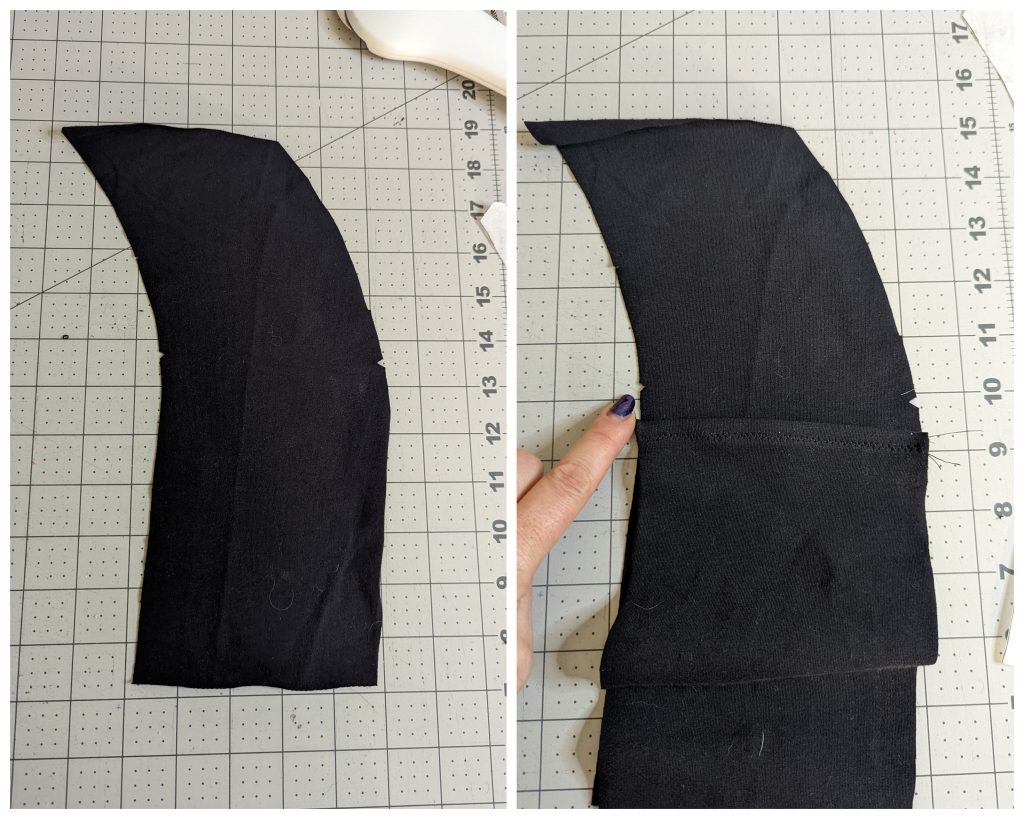
You can now lift the side panel piece and sew across the bottom of the pocket liner and bag.
Once those are all sewn, pin it and do a basting stitch down both sides of the pockets. You now have a side panel with a pocket that is ready to be sewn into the rest of the shorts.
The Rest of the Outfit!
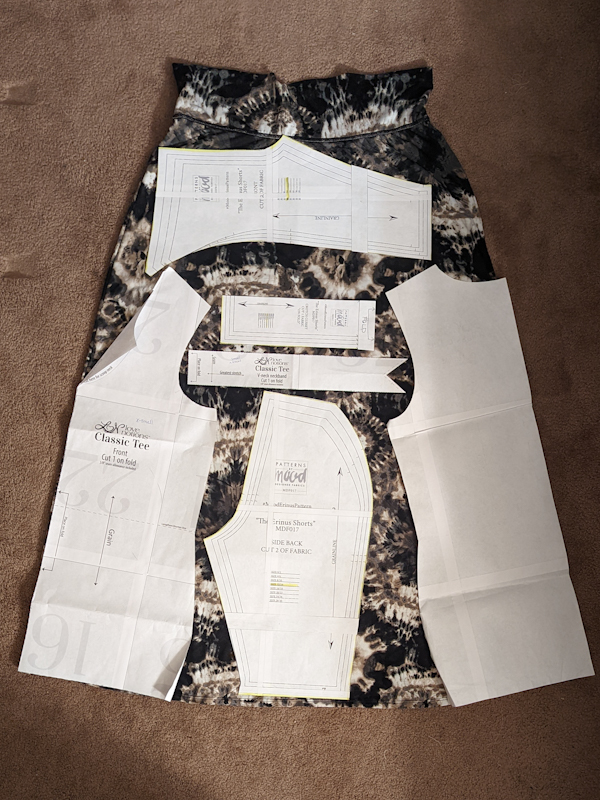
First the rest needs to be cut out. The shorts pieces were the side back, front and gusset. The gusset was supposed to be cut on the fold so I had to add some length in to account for seam allowance.I used some black scraps for the waistband (not pictured). I used the Classic Tess by Love Notions for the shirt. You can use a shirt pattern you already have or take a pattern from a shirt that fits you well. I liked the Classic tee because it has a v-neck option. I intended on the shirt front and back having the skirt seam down the front. I thought the v-neck would look cute with that.
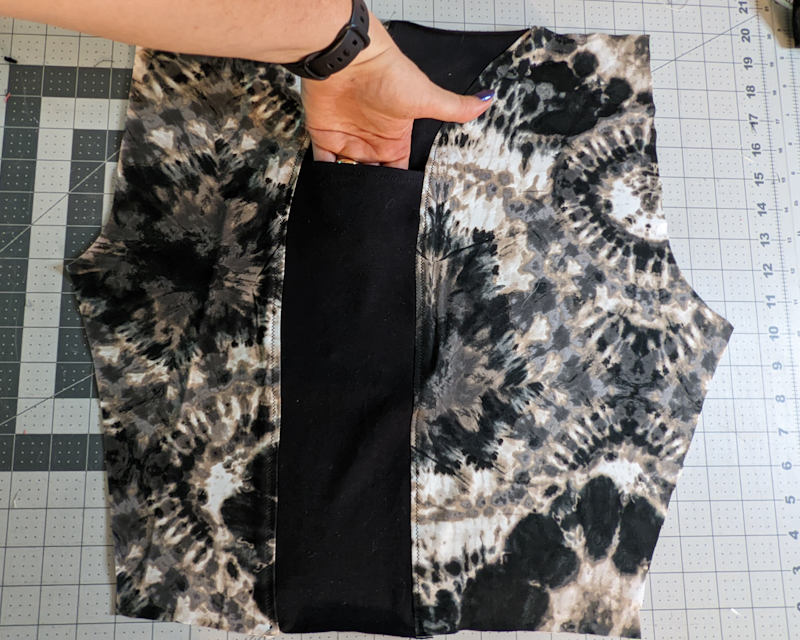
Once all the pieces were cut out, I was able to attach the side panel to the other pieces. This is what that looked like.
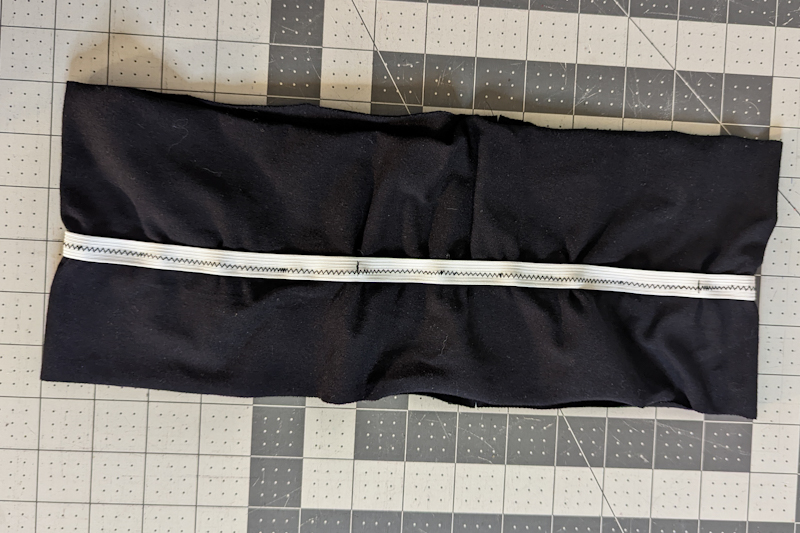
Something I really like to do on the fabric waist bands of legging and biker shorts is add elastic. I use ½” elastic and I sew it to the middle inside of the waistband like you see below. I sew it ½” more to one side though. That way the waistband can fold in half and the elastic can lay flat. Once I have it attached to the inside I fold it in half right side out so the elastic is on the inside. The elastic will just be at the top of the waist band. That little bit of elastic helps the waist stay put and is much more comfortable than a thick piece of elastic. I bought a RTW pair of bike shorts that had this little bit of elastic in it and I LOVED it. So now I always do it.
Once both the shirt and shorts were assembled I had the perfectly coordinated matching set to lounge or work out in. I absolutely love how they turned out! Now go get your FREE Erinus Shorts pattern from Mood and make some with pockets too! It’s so much easier than you think.
Happy Sewing my Friends!
If you are looking for a t-shirt pattern try the Classic Tee by Love Notions! You can get a 10% discount by using code KOE10
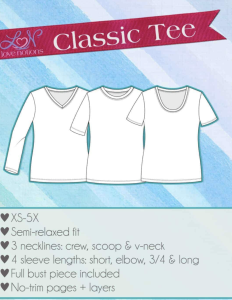
The Classic Tee sewing pattern is a semi-relaxed tee with just the right amount of ease where you need it. Choose from three neckline options: crew, scoop and v-neck. Also included are four sleeve lengths: short, elbow, 3/4 and long. This tee is a great beginner project, especially for an introduction to sewing with knits. A full bust piece is also included.
- Meant for knit fabrics
- Three necklines: crew, scoop & v-neck
- Four sleeve lengths: short, elbow, 3/4 & long
- Semi-fitted style
- Full Bust option
Sizes: XS-5X (See Size Charts here)
Skill Level: Beginner